Tag: coding

2nd Grade Counting Coins with Scratch

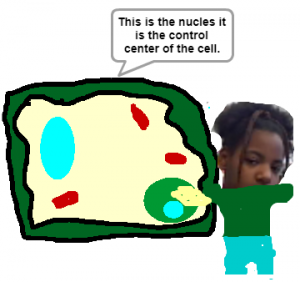
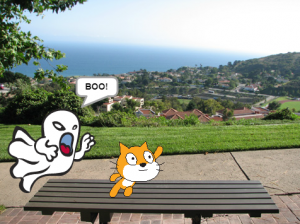
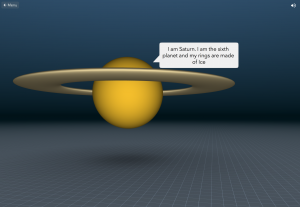
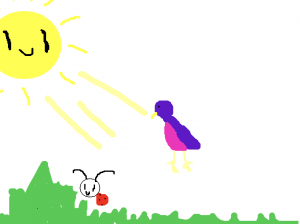
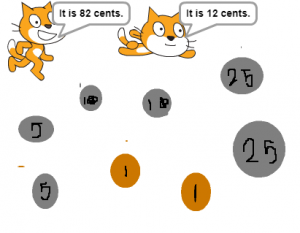
Second graders at Holladay Elementary have been learning how to count coins up to two dollars (SOL2.10a), so today, students in Ms. Brown’s class used Scratch to create a counting coins activity. First, we reviewed the coins and and practiced counting the value of groups of coins. Then I showed them a sample Scratch activity to prepare them for making their own project. Basically, it displays a group of coins with two characters stating different values. If you click on the character who correctly identifies the amount, they congratulate you with a “Good job!” or a similar statement. If you click on the character who is incorrect, they let you know you are wrong in a nice way by saying something like, “Try again!” Once the students got an idea of what they were doing, they were ready to begin their own activity. They started by editing the background and drawing a group of coins. They needed to make the coins easily identifiable by using the correct sizes, colors, and designs. Next, they chose two sprites, or characters, from the library. Using the block code, we programmed the characters to say a right and a wrong value and to let the player know if they chose correctly or incorrectly. Finally, we published our projects and shared the links on Schoology so our classmates could try our activities. You can try them yourself here.


Tags:


4th Grade Moon Phases with Scratch

Fourth graders at Varina Elementary have been learning about the phases of the moon (SOL4.8), so today, students in Ms.Stevens’ class used Scratch to illustrate the phases. First, we signed into our Scratch accounts and created a new project. I showed them how to click on the background button at the bottom and select a space image from the library. Next, we deleted the default Scratch sprite (right click on the cat sprite and choose “Delete”). The students went to the sprite library and chose a character to be the “instructor” who would identify the different phases of the moon. Then we created a new sprite for the moon and just painted different costumes showing the phases in order. To cycle through the costumes, I demonstrated how to use the “Looks” and the “Control” code blocks to command the sprite to switch to the next costume every second forever. We also had to make sure that it always started at the correct place, so our first bit of code set the “Looks” to the first costume. Once our moon was cycling through its phases, we had to make the instructor identify each one. Again, we used the “Looks” and the “Control” code blocks to control it. We set it to “Say” the moon phase for 1 second (since our costumes were cycling every second) forever. However, we discovered that after a couple of cycles the timing was off, so we changed the time for saying the last phase to 1.3 seconds, and that seemed to fix it. Finally, we published our projects and shared the links on Schoology. You can see them all here.


5th Grade Programming Cell Parts

Fifth graders at Laburnum Elementary have been learning about plant and animal cells (SOL5.5a). Today students in Ms. Burgess’s class used Scratch to write a program that identifies the parts of a cell. First, we reviewed the cell parts and their functions and discussed ways that students could research additional information (using books, notes, or the Internet). I explained that we would be writing code today, which is similar to the code that is in each cell. DNA gives directions for things to happen inside the cell, and our code will give directions for things to happen in our diagram. Just like in DNA, if one piece of the code is wrong, it can create a problem. That’s why we teach elementary students to code, because it requires logic and problem solving skills to make sure their code works. After we set up our Scratch accounts, the students created a new project, clicked the background icon, and painted a background image of a plant or animal cell. Next, we deleted the Scratch sprite (the default cat character) and created our own. I showed them how to take their photo with the camera button and turn themselves into a sprite. Finally, we used the coding blocks to build a program that moved our sprite to different parts of the cell and identified their names and functions. You can see all their projects here.


Tags:


5th Grade Coding Causes & Effects

Fifth graders at Holladay Elementary have been learning about cause-effect relationships (SOL5.5j). Today students in Ms. Neal’s class illustrated cause-effect relationships with animations created in Scratch. First, we brainstormed ideas of different situations that clearly show causality: accidents, sicknesses, successes, failures, surprises, etc. Next, the students logged into their Scratch accounts and created a new activity. I showed them how to add additional sprites and change their costumes. We wanted the costumes to reflect the cause-effect relationships. For example, if the milk spoiled, one costume would show good fresh milk, and the other costume would show green rotten milk. The person drinking it could have two costumes as well, one with a happy face and one with a disgusted face. In order to build the animation, we used the codes for Motion, Looks, and Control. Each sprite had its own code telling it when and how to move. The code also programmed the sprites to “say” things and change their costumes at specific times. One of the great features of Scratch, is that every project has a “Look Inside” button that you can click to see the code. Take a look at all of their projects here.


Tags:


4th Grade 3-D Planet Models

Fourth graders at Laburnum Elementary have been learning about the planets in the solar system (SOL4.7), so today students in Ms. Mayer’s class used CoSpaces to create 3-D models of the planets. A cool idea would be to use this tool to create a 3-D model of all the planets, comparing their sizes like this example, but we didn’t have time for that. The students each chose one planet to research, then they logged into CoSpaces with their Google accounts, and created a new space. First, we clicked the Environment tab at the bottom and selected Night, making the background dark like outer space. Next, we went to the Library tab and clicked Building Blocks. The students selected a sphere and I showed them how to resize it and raise it with the pop-up tools. Double clicking the sphere brings up more tools, and the students used the paint brush tool to change the color of the sphere to match the planet. They also added a speech bubble and typed some facts about the planet. When they finished, they went back to the library and selected additional objects like rings for Saturn or a space ship. Finally, they clicked the Share button at the top, copied the link, and posted it in Schoology for their classmates to see. You can visit all their planets here.


3rd Grade Coding a Food Chain

Third graders at Holladay Elementary have been learning about food chains (SOL3.5), so today students in Ms. Whittaker’s class created an animated food chain using code in Scratch. First, we reviewed the different types of aquatic and terrestrial food chains, and we discussed how all food chains start with the sun. Next, I helped the students set up their Scratch accounts. We started a new project, deleted the cat sprite (the default character), and I showed them how to draw their own sprites. They drew a sun, a plant, an animal to eat the plant (an herbivore), and an animal to eat that animal (a carnivore). Since it was going to be animated, they also drew several costumes for each sprite. For example, their sun sprite had costumes showing the rays shining down on the plant, and their plant sprite had costumes showing how it was being eaten. Finally the students added code to each sprite. The sun code looped through the costumes so it repeatedly sent rays to the plant. The other sprites’ codes programed them to move and cycle through the costumes at different time intervals, making it look like they were eating and getting eaten. We shared our project links on Schoology, but you can see them all here.


Tags:


3rd Grade 3-D Animal Reports

Third graders at Holladay Elementary have been studying animals and their habitats in Science (SOL3.4, 3.5, 3.6). They have also been learning about how to write research reports in Language Arts (SOL3.11). Today students in Ms. Ambrose’s class researched an animal of their choice with PebbleGo and created a 3-D report using CoSpaces. First, students selected an animal and used PebbleGo to find out about its habitat and its design, or adaptations. We discussed whether PebbleGo is a reliable website (it is :). Next, we logged into CoSpaces with our Google accounts, and I showed them how to choose a background image that looked like the animal’s habitat. Then we searched for a 3-D model of our animal (or an animal that looked similar). I explained that they can change the color of their animal by right clicking on it. They also needed to use the right-click to make the model accessible in Blockly (the coding language). We wanted to code the animal to speak about itself and share the facts we learned, but before we could do that, we had to record ourselves. We used Vocaroo to record and save an MP3 file (you could also use Audacity). We uploaded the file to CoSpaces using the Upload button. Finally, in Blockly, we added a few bits of code to make the animal speak when you click on it. Some of the students even added code to make the animal move. We published our projects and shared the links on Schoology. You can see them all here.


3rd Grade Matter Transitions

Third graders at Varina Elementary have been learning about matter and how it changes states from solid to liquid to gas and back to solid again (SOL3.3). Today students in Ms. Galvin’s, Ms. Long’s, and Ms. Hummel’s classes used Google slides and Scratch to show different types of matter changing states. Ms. Hummel’s class focused on water in their Google slideshows. We used the Transitions feature to animate pictures of water fading from solid ice to liquid or from liquid to water vapor. Ms. Galvin’s and Ms. Long’s classes chose different types of matter that can melt and freeze (like chocolate, ice cream, and Popsicles). First, they drew two costumes for their object (the solid state and the liquid state). Then they added code so that clicking the object changes its state, or costume. Some students also added code for their objects to “say” a fact about the state of matter. When their projects were finished, we published them online and shared the links on Schoology. You can see them all here.


5th Grade Coding an Ocean Tour

Fifth graders at Trevvett Elementary have been learning about the ocean (SOL5.6), so today students in Ms. Adamonis’ class used code to create an ocean tour in Scratch. First, we discussed different topics they could include in their tour: parts of the ocean floor, different depth zones, and various ecosystems. Next, we went to Scratch, and I showed them how to change the background by either drawing it or uploading a picture. Then they needed to add a tour guide (called a “sprite” in Scratch). Most of the students chose one from the built-in library, but they could also draw their own. Finally, I explained how to use code to create the tour. The drag and drop pieces of code could be used to animate the tour guide and make it “speak.” They quickly discovered the sound effects code and had fun adding audio to their projects. Some of the students went way beyond the original scope of the assignment and added keyboard strokes so that it could be played by an external controller (like a Makey Makey). They shared their finished projects on Schoology, but you can see them all here.


Tags:


3rd Grade Coding with Cycles

Third graders at Trevvett Elementary have been learning about cycles (SOL3.8): the lunar cycle and plant and animal life cycles. Today students in Ms. Smith’s class used basic coding skills to create animated diagrams of a cycle of their choosing. First we went to the Scratch website and created an account. Scratch is a programing language developed by MIT to teach children about coding. We started a new project and clicked the Stage button. Then we clicked the paint brush icon to create a new stage. The students used the paint tools to draw a diagram of one of the cycles. Next we right clicked on the default sprite (the Scratch character) and deleted it. I showed the students how to choose a new sprite from the sprite library. Now it was time to write some code. The students positioned their sprite where they wanted it to start. They chose “When the flag is clicked” Event to begin their code and added a “go to x-y” element from the Motion library. Then they added a “say _ for _ secs” element from the Looks library and typed the first step in the cycle. For each subsequent step, they moved their sprite to another part of the cycle, added a “glide 1 secs to x-y” Motion element and a “say _ for _ secs” Looks element until all the parts were identified. Testing the code is the most important part and provides an excellent opportunity for logical thinking and problem solving when the animation doesn’t work out as planned. When the students’ projects finally worked, they pressed the “Share” button and pasted the links to Schoology. You can see all their projects here (be sure to press the “See inside” button to take a look at their coding).


Tags: