Tag: animation

4th Grade Animated Famous Virginians
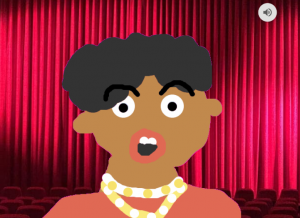
Fourth graders at Varina Elementary have been learning how to use online, reliable resources for research (SOL4.9), and they have been studying famous Virginians (VS.9). So today students in Ms. Belcher’s and Ms. Connell’s classes used this website to choose a famous Virginian and discover some interesting facts about them. Since we would be drawing our person, we did a Google image search for them to see what they looked like. We looked at their hairstyle, their clothing, and whether or not they wore glasses or facial hair. Next, we navigated to a great animation tool called BrushNinja. It’s free and doesn’t require a login. I explained that animation is basically a series of still pictures that are played one after another, kind of like the flip pages in Captain Underpants books. We drew our person on the first page, then duplicated the page several times and changed the mouth and the eyes in each image, so it looked like they were talking when we hit the play button. Before we exported our animation, we clicked the settings button at the top (the gear icon) to remove the background and slow down the frames per second. Then we saved our animation as a GIF file. The second step was to record audio of the person telling about their accomplishments using another great, easy-to-use web tool called Vocaroo. We downloaded the recording as an MP3 file. The final step was to combine the animation and the audio into a Google slides presentation. A new feature of Google slides is the ability to add sounds, but you have to save the MP3 files in a shared Google folder. I showed the students how to create a folder in their Google drive, share it, and upload the MP3 file into it. Finally, we made a Google slide, added a background image that related to our person, and uploaded the animation and sound files. They turned out really great! You can see them all here.

5th Grade Light & Sound Animations

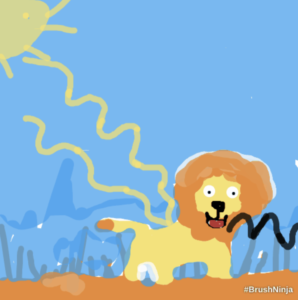
Fifth graders at Laburnum Elementary have been studying light (SOL5.6) and sound (SOL5.5) and their various wave frequencies, so today students in Ms. Johnson’s class showed what they have learned by making animations. First we reviewed light and sound waves and their appearance so we could illustrate them correctly. We looked at a virtual oscilloscope, generated our own wave frequencies with Wave on a String, and explored different visualizations with Seeing Music. We even explored a 3-D model of the human ear to see how we hear sound waves. Although we didn’t get to explore light (a good site for experimenting with the light spectrum is Physics Classroom), I did remind them that colors on the red end of the spectrum have lower frequencies, and colors on the violet side of the spectrum have higher frequencies. It was now time to create our animations. We went to BrushNinja, and the students drew a creature or an object that made sound. Then they decided if it produced low frequency or high frequency sounds, and they illustrated the sound waves. If they had time, they illustrated the light waves as well. Some students even identified the angles in their drawing as acute, right or obtuse since they are learning about angles in Math (SOL5.12). They downloaded their animations as GIF files and posted them to Schoology with a description. You can check out some of their animations and descriptions here.


2nd Grade Animal Habitat Animations

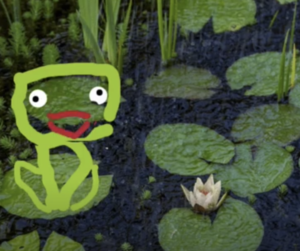
Second graders at Holladay Elementary are learning about animal habitats in Science (SOL2.5), so today students in Mr. Reams’ and Mr. Gunter’s classes created animal animated GIFs with sound. Usually GIFs don’t have audio, but we attempted a workaround. First, we reviewed different habitats (woodlands, rainforest, grasslands, desert, arctic, ocean, freshwater, etc) and the animals that live in each. Then, we went to BrushNinja and added a background image of the habitat. Some students chose to draw their own background while others used the built-in photo search. Next, they used the drawing tools to draw an animal that lives in that habitat. I showed them how to duplicate the frame at the bottom and make slight changes in their animal drawings to make it appear like it’s moving. I pointed out that their animal will be speaking so they need to animate the mouth. We discussed different ways to draw the mouth in each frame so it looked like it was talking: an 0 shape, a straight line –, with teeth showing, with the tongue sticking out, etc. When they finished their animations, they exported them as animated GIFs and uploaded them to a Schoology discussion. To add the audio, I showed them how to reply to their own post in Schoology and click the microphone button to record. I later combined the audio with the animations in WeVideo. You can see their finished projects here: Mr. Gunter & Mr. Reams.


3rd Grade Fractions Animations

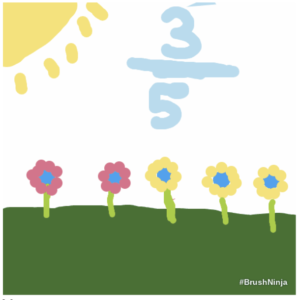
Third Graders at Trevvett Elementary have been learning about fractions in Math (SOL3.2), so today students in Ms. Peay’s class created fraction animations with BrushNinja. First we discussed fractions of a group and viewed various examples. Then we discussed how we might illustrate these types of fractions with animations. The students had some great ideas: a group of oranges that progressively rotted, a candy bar being eaten in sections, a bunch of ice cream cones melting one-by-one. We went to BrushNinja, and I instructed the students to draw their group of objects at the beginning when they all looked the same. I asked, What fraction would this represent? Since the animation is showing the fraction that had changed, we figured that we should write the fraction as 0/total. To save time, I showed them how they could duplicate the drawing, make a change to one object in the group, write the fraction, then continue that process until all the objects had been changed and the final fraction was total/total. Or as another option, students could redraw the picture in each successive frame with the changes and the new fractions. The final projects turned out great. You can see them here.


3rd Grade Water Cycle Animations

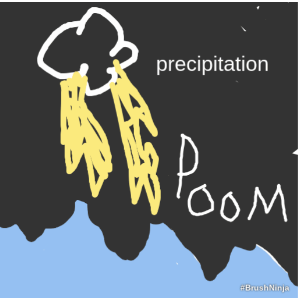
Third graders at Holladay Elementary have been learning about the water cycle (SOL3.7), so today, students in Ms. Szyperski’s class used BrushNinja to create animations illustrating the water cycle. First, we discussed each step in the cycle: evaporation, condensation, precipitation, and runoff. We also talked about different ways to illustrate each one creatively. I showed them how to use the text tool in BrushNinja to label each step and how to copy the frames at the bottom to save time. When they were finished, they exported their projects as animated GIFs and posted them on Schoology to share with their classmates. They turned out great! You can see some student examples here.


3rd Grade Moon Phases Animations

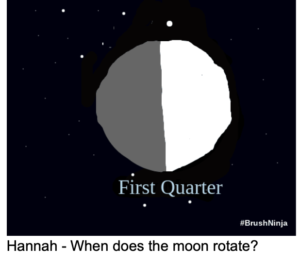
Third graders at Trevvett Elementary have been studying the movements and phases of the moon (SOL4.6c), so today students in Ms. Hufnell’s class used BrushNinja to create animations of the four main phases: new moon, first quarter, full moon, and last quarter. I started off by telling the students that today they will see a side of the moon they’ve never seen before, and they will get to actually look around the moon as if they were standing right there! First, to see the far side of the moon, we went to Google maps, clicked Satellite view (bottom left corner), turned on 3D (bottom right corner), and zoomed all the way out. When you zoom all the way out, you see the Earth, but over on the left side a panel should open up with the moon and planets. We clicked the moon and now we could click and drag it around to see the phases and the back side. Since the same side of the moon is always facing the Earth, this is a side we never see. We also looked at the top and bottom of the moon. Next, to look around on the surface of the moon we explored this panoramic photo from China’s Chang’e Lunar Mission. I asked the students if they knew what phase of the moon it was in right now. How could they find out? We went to NASA’s “Moon In Motion” website, which not only tells the current phase, but also has some great images, videos, and interactive diagrams. After reviewing the phases of the moon, we were ready to design our own moon phases animations. We went to BrushNinja and got a space background by clicking the background button at the bottom and either searching for a space background or choosing a solid black color and drawing small white dots for stars. Then we used the shapes tool to draw a grey circle for the moon. They could decorate it with craters, if they wanted. We also used the text tool to type “New Moon.” The students then duplicated this image three times (using the bottom button that looks like two sheets of paper), and used white paint to illustrate the different phases. For the full moon, I suggested that they make a new white circle the same size as the grey circle, instead of trying to fill it in with white paint. When they finished their animations, they exported them as GIF files and shared them on Schoology. In the comments, they typed questions about the moon for their classmates to answer. You can see their animations and questions here.


5th Grade Figurative Language & Force Animations

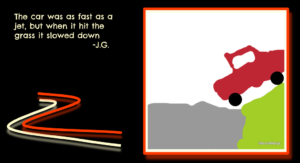
Fifth graders at Varina Elementary have been learning about figurative language (SOL5.4d) and force and motion (SOL5.3). Today, students in Ms. Messer’s class created animations with BrushNinja to illustrate different types of force and motion. Their animations showed pushing, pulling, speed, collisions, kinetic energy, and the effects of friction. They exported their creations as animated GIFs, then uploaded them to Schoology to share with their classmates. Along with their post, I encouraged them to type a sentence about their animation that included figurative language such as exaggeration (hyperbole), personification, similes, or metaphors. Later, I compiled their animations and sentences into a Google slideshow that you can see here.


3rd Grade Life Cycle Animations

Third graders at Holladay Elementary have been learning about animal life cycles in Science (SOL3.8b) and time in Math (SOL3.9), so today students in Ms. Pumphrey’s class created animated life cycles showing the time duration of each stage. First, they chose an animal and used the Internet to research the animal’s life cycle. I instructed them to focus on how long each stage lasted, and if they couldn’t find that information, they could used the microphone and ask Google (for example, “How long is the egg stage of a ladybug life cycle?”). We were surprised by how short and how long some of the stages lasted! Next, we went to BrushNinja, which is a free online animation tool, and illustrated our animal’s life cycle. We used the text tool to type how many days or months each stage lasted. Then we exported our animations as GIF files and shared them with our classmates in Schoology. You can see a few student samples here.


4th Grade Force & Motion Animations

Fourth graders at Laburnum Elementary have been learning about force and motion in Science (SOL4.2). Today, students in Ms. Wolinski’s class created animations to illustrate these concepts. In the past, we have used ABCYa! Animate for animation projects, but today we used a more advanced tool called Wick. I like Wick because you can move each individual part of your drawing, so it makes the process of creating an animation a lot easier. First, we acted out different types of force, motion, and energy, including kinetic and potential energy, to get ideas for our projects. Potential energy is a difficult concept to understand, so we explored examples like pulling back on a bowstring, taking a deep breath before blowing up a balloon, raising a hammer, pressing your fingers together in preparation to snap, pulling your arm back to throw a ball, etc. For each example, we thought of ways to increase the potential energy–pulling back further or pressing harder or lifting higher. Now that we had some ideas, we launched the Wick editor. I demonstrated how to illustrate the first frame of their animation using the paint tools. Then I showed them how to duplicate the frame and move different parts of the drawing in small increments on each subsequent frame. If there is too drastic of a change in the position of the objects, the animation looks jarring instead of smooth. The students continued duplicating and manipulating their frames until they had an animation that illustrated force and motion. Our animations were a bit too fast though, so I explained how to slow them down by going to the Project Settings (the gear icon in the top right corner) and changing the frame rate. Finally, we clicked File > Export Animated GIF and uploaded our finished animations to Schoology. You can see some student samples here. UPDATE: I taught a similar lesson with Ms. Stevens’ class using another animation app, Brush Ninja, and added those to the project page.


1st Grade Push & Pull Animations

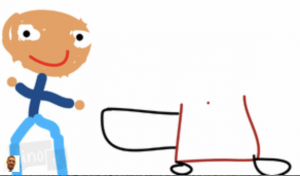
First graders at Holladay Elementary have been learning about force and motion, specifically how pushing and pulling can change the motion of an object (SOL1.2c). Today, students in Ms. Wimmer’s class used Wick to create animations showing a push or a pull. First, we discussed and demonstrated different types of pushes and pulls that first graders would be familiar with: kicking a ball, opening a door, fishing, swinging, jumping, running, etc. Next we went to Wick, and the students discovered something I never knew about Wick. (By the way, that’s one thing I absolutely love about teaching technology–the students often teach me things). They showed me that you could click on the letters on the homepage and different animations occur! After that awesome discovery, we launched the editor, and I explained how to use the paint brush tools. In the first frame they painted a picture of someone pushing or pulling something. We clicked the Clone Frame button to make a copy of the image, and I showed them how to group the objects together and drag them with the arrow tool. We continued making copies and moving the objects until we had about five frames. When we clicked “Run,” the students were thrilled to see their animations play out. Since the animations were a little fast, we clicked the Settings gear in the top right and changed the frame rate to 5. Finally, we exported our animations as GIF files (File > Export Animated GIF) and uploaded them to Lino (an online bulletin board similar to Padlet). You can see them all here.