Category: 1st Grade

1st Grade Maggie Walker Research
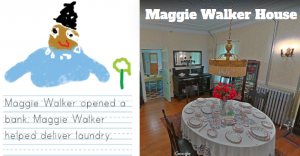
First graders at Pemberton Elementary have been learning about two famous Virginians Maggie Walker and Arthur Ashe (SOL1.3d,e), and they have been learning how to conduct research (SOL1.14). So today, students in Ms. Hutton’s class researched Maggie Walker and shared their findings using ABCYa! StoryMaker. I showed them how to use the microphone feature on Google to ask any questions they had about Maggie Walker. It was great listening to all their curious questions! One student’s question even led to an interesting discovery for all of us. He asked, “Did Maggie Walker have a car?” We found out that she did, in fact, sell her horse and carriage to purchase an electric car in 1910. Wow! I didn’t even realize they had electric cars in the early 1900s. There’s a fascinating article about it here, if you’d like to learn more. I love it when students teach me things! We also took a virtual field trip to Maggie Walker’s house, right here in Richmond, using Google Maps. When we dragged the yellow street view man to her house, we realized that we could even explore inside her home (see photo)! After learning so many amazing things about Maggie Walker, we went to ABCYa! StoryMaker and typed complete sentences about her, using capitals and periods (SOL1.13). Then we drew a picture of her with the drawing tools and shared our reports on SeeSaw. You can see them all here.


1st Grade Fractions with LogoMakr

First graders at Laburnum Elementary have been learning about fractions (SOL1.4), so today students in Ms. Mackenzie’s class used Logomakr to create their own fractions. Logomakr is a great webtool for elementary students – it’s easy to use, there’s no sign in, it has a huge library of clipart, and you can save your images with a link or as a downloadable PNG file. For this lesson, I created a template you can see (and use) here. To create a template, just design your task in LogoMakr, then save it and copy the link. When students click on the link and make changes, it generates new links for their projects, so your template is not changed. First, I showed them how to change the colors of the shapes to create their own fractions. Then, I demonstrated how to double-click on the fractions to change the numerator and denominator to match their illustration. Finally, we used the clipart search feature to make our own fractions. Students found a clipart image they liked, copied and pasted it several times to make a group, then changed the color of a few items and typed the fraction of the colored ones compared to the whole. You can see some student examples here.


1st Grade LogoMakr Templates

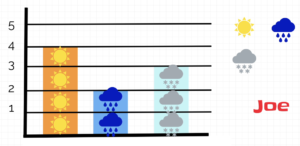
LogoMakr is a cool website for making logos. It has a great library of clip art and customizable text. But one of the things I like most about using LogoMakr in the classroom is you can design templates with it for your students to use. Just set up the page with the text and images you want, then save it, and send the link to students. They can change it up as much as they want, and when they save it, it gives them a new link, so your original template isn’t changed at all. For lower grades it’s especially great because it doesn’t ask them to sign in to use it. Here are two examples I used with first grade students at Laburnum Elementary today: In one class we made fractions (SOL1.4). The students changed the colors of the shapes in my template and typed the fractions in the text boxes. Then they made their own fraction with the shapes tool. In another class we created weather graphs (Math SOL1.12 & Science SOL1.7). The students dragged the weather symbols to make a pictograph, then they dragged the bars to make a bar graph. They also changed the colors of the bars. You are welcome to use these templates or adapt them as you wish. Try LogoMakr with your class!


1st Grade Jamestown Comics

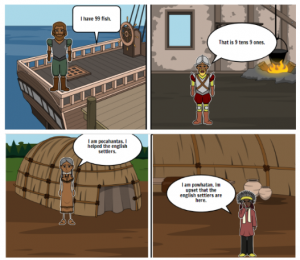
First graders at Trevvett Elementary have been learning about Jamestown in History (SOL 1.1c, 1.2a, 1.3abc). This is a new SOL for first grade (it is also taught in 4th grade), so many teachers are eager for new ideas. Today, I showed Ms. Burnett’s class how to use StoryboardThat to create Jamestown comics. We visited the site and clicked the “Create” button. The default comic has three panels, which was perfect since the students need to know three important people from Jamestown: Powhatan, Pocahontas, and Christopher Newport. First, we clicked Scenes > US History to find backgrounds relating to Jamestown. After the students added the scenes to each frame, they clicked Characters > 1600s to 1800s and added people who looked like Jamestown colonists and Powhatan Indians. Then we clicked Textables to add speech bubbles to each person. First graders are learning how to write complete sentences with capitals, punctuation, and correct spelling (1.13), so we practiced those skills as we typed in the speech bubbles. I encouraged the students to include facts about Jamestown in their sentences. Finally, we published our comics and shared the links on Schoology. You can see some examples here. (UPDATE: In Math, 1st graders are are learning about place value, so we did a similar Jamestown comic with another class, but this time the characters talked about place value).


Tags:


1st Grade Fall Videos

First graders at Holladay Elementary have been learning about the fall and how it affects animals, people, and the weather (SOL1.7). Today, students in Ms. Sokolowski’s class used WeVideo to create their own fall videos. First, they chose a partner to work with, and one of the partners signed into WeVideo using their Google account. I showed them how to press the red record button and set up their webcams following the on-screen prompts. Next, we brainstormed ideas to talk about, making sure they understood that the topic was fall (sometimes first graders like to go off topic :). We also discussed the importance of looking at the camera and speaking loudly and clearly. Ms. Sokolowski and I recorded a sample video to model the process for the students.
Finally, the students were ready to record their own videos. We walked around, providing guidance as needed and trying to stay out of their movies. When they were finished, I showed them how to save their videos. We downloaded them and saved them to our Google drive (if you have the free version of WeVideo, the videos will eventually be removed over time, so be sure to download them if you want to keep them). You can see some of the students’ videos here.


Tags:


1st Grade Ordinal Numbers

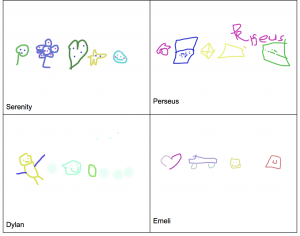
First graders at Laburnum Elementary have been learning about ordinal numbers (SOL1.3). Today, students in Ms. Leibowitz’s class identified the ordinal numbers of objects in a drawing they created. First, we helped the students log into the computers, since they haven’t had much experience with them. Then we went to Kleki, a free drawing site I like because it’s simple to access and use. We started off just scribbling in order to practice using the click and drag technique. This, in itself, is a challenge for young students developing their fine motor skills. Once they got the hang of it, I showed them the Undo button, and we undid all the scribbles. Now it was time to start drawing pictures. I demonstrated how they could change colors using the rainbow. They could draw anything they wanted, as long as the objects were in a row, since we would be identifying their ordinal positions. Some first graders get very concerned if their pictures are not perfect, so I let them know that their pictures could be messy (I did a few messy examples). Even a squiggle could be a snake or a worm. Their drawings could be simple (circles, squares, triangles), or, if they wanted a challenge, they could make them more complex (trees, houses, cars), by combining shapes together. But, I explained, the most important thing was for them to enjoy the process. As they finished, I went around and saved their work (File > Export Image). I also uploaded the pictures to a shared Google doc, accessed with a link shortener so I could navigate to it quickly from each student’s computer. Finally, once all the students’ artwork was uploaded, we looked at the pictures and identified the ordinal position of different objects. For example, what is the position of the flower? What is in third place? You can see their pictures here. UPDATE: I have used Kleki to teach lessons in other first grade classes for shapes (SOL1.11a) Ms. Spencer & Ms. Milteer and patterns (SOL1.14) Ms. Sunseri & Ms. Burnett.


1st Grade Push & Pull Animations

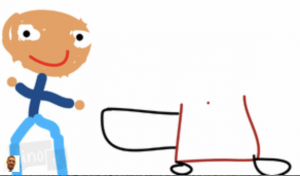
First graders at Holladay Elementary have been learning about force and motion, specifically how pushing and pulling can change the motion of an object (SOL1.2c). Today, students in Ms. Wimmer’s class used Wick to create animations showing a push or a pull. First, we discussed and demonstrated different types of pushes and pulls that first graders would be familiar with: kicking a ball, opening a door, fishing, swinging, jumping, running, etc. Next we went to Wick, and the students discovered something I never knew about Wick. (By the way, that’s one thing I absolutely love about teaching technology–the students often teach me things). They showed me that you could click on the letters on the homepage and different animations occur! After that awesome discovery, we launched the editor, and I explained how to use the paint brush tools. In the first frame they painted a picture of someone pushing or pulling something. We clicked the Clone Frame button to make a copy of the image, and I showed them how to group the objects together and drag them with the arrow tool. We continued making copies and moving the objects until we had about five frames. When we clicked “Run,” the students were thrilled to see their animations play out. Since the animations were a little fast, we clicked the Settings gear in the top right and changed the frame rate to 5. Finally, we exported our animations as GIF files (File > Export Animated GIF) and uploaded them to Lino (an online bulletin board similar to Padlet). You can see them all here.


1st Grade Plant Sentences

First graders at Holladay have been learning about plants and their needs (SOL1.4). They have also been learning how to write complete sentences starting with capital letters (SOL1.13d,e). Today students in Ms. D’Antonio’s class used ABCYa! StoryMaker to create drawings of plants and write a sentence about plant needs. First, we reviewed the things that most plants need to live: sunlight, water, and soil. Then, we went to StoryMaker, and I showed them how to use the different brush tools to draw a picture of a plant. I suggested that they also include the things that their plant needs. Some students even knew that sunlight + rain make a rainbow, so they used the rainbow brush to add a rainbow to their picture. Next, we clicked the yellow button on the side to go to the writing section. Storymaker has the familiar lined paper and a font that early elementary students can read easily. I showed the students how to use Shift to make a capital letter and how to use the space bar to make spaces between each word. We started our sentences the same way: “A plant needs…,” then they chose the ending and added a period. You can see their plant drawings and sentences here.


1st Grade Maps

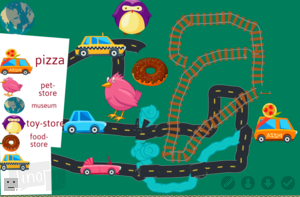
First graders at Trevvett Elementary have been learning about maps (SOL1.4) and how to make maps with symbols and a legend (SOL1.5). Today, students in Ms. Robinson’s class created their own maps with ABCYa! Paint. First, we drew some land and water features. Next, we used the rainbow brush to paint roads, railroads, and rivers on our map. I explained that rivers usually flow into the ocean and roads and railroads need to go to different parts of the land. Then we looked at the stickers and discussed what they could symbolize. For example, a loaf of bread could be a symbol for a bakery and the Earth could be a symbol for a science museum. They added sticker symbols to their map, and they also added them to their map legend. The last step was to use the text tool to type words next to the symbols in the legend, explaining what they mean. We saved our maps and uploaded them to a Lino board (it’s similar to Padlet, which recently changed its policy for free accounts). You can see their finished maps here. (UPDATE: I taught a similar lesson in Ms. Shelly’s class at Holladay, and you can see their maps here).


1st & 2nd Grade Melting Matter

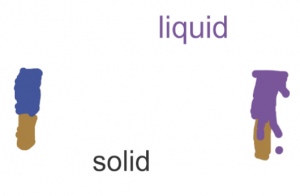
First graders at Holladay Elementary have been studying matter (SOL1.3), and they have learned that matter can be solid or liquid. Today, students in Ms. Milteer’s class created animations showing how a solid can turn into a liquid by melting. First, I showed them some time-lapse videos of various solids melting (ice cream, snowman, ice cube, butter, crayon, chocolate, candle). You may even want to record your own time lapse video of something melting. Many phones and tablets have a time lapse recording feature. Next, we went to ABCYa! Animate, and the students drew a solid object in the first frame. In the second frame, they drew the same object melted into a liquid. Then, we pressed play and slowed down the speed to watch our animations. Finally, we exported the projects as .gif files and shared them on Padlet). You can see them all here. UPDATE: Second graders learn about the states of matter as well (SOL2.3), so here are some student samples from a similar lesson I did with them using BrushNinja.