Category: 2nd Grade

2nd Grade Animal Habitat Animations
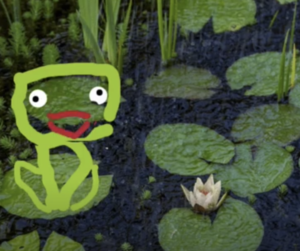
Second graders at Holladay Elementary are learning about animal habitats in Science (SOL2.5), so today students in Mr. Reams’ and Mr. Gunter’s classes created animal animated GIFs with sound. Usually GIFs don’t have audio, but we attempted a workaround. First, we reviewed different habitats (woodlands, rainforest, grasslands, desert, arctic, ocean, freshwater, etc) and the animals that live in each. Then, we went to BrushNinja and added a background image of the habitat. Some students chose to draw their own background while others used the built-in photo search. Next, they used the drawing tools to draw an animal that lives in that habitat. I showed them how to duplicate the frame at the bottom and make slight changes in their animal drawings to make it appear like it’s moving. I pointed out that their animal will be speaking so they need to animate the mouth. We discussed different ways to draw the mouth in each frame so it looked like it was talking: an 0 shape, a straight line –, with teeth showing, with the tongue sticking out, etc. When they finished their animations, they exported them as animated GIFs and uploaded them to a Schoology discussion. To add the audio, I showed them how to reply to their own post in Schoology and click the microphone button to record. I later combined the audio with the animations in WeVideo. You can see their finished projects here: Mr. Gunter & Mr. Reams.

2nd Time Activities with Wick

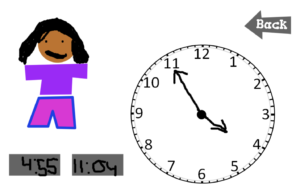
Second graders at Laburnum Elementary are learning how to tell time to the nearest five minutes (SOL2.9), so today students in Ms. Brouillard’s class created time activities with Wick. First, I showed the students a sample and explained that each button works with code. If you click the button with the correct time, the character turns happy, but if you click the button with the wrong time, the character turns sad. The Back button returns the character to its normal, beginning state. I explained that the students will be able to customize their own character, clock, and buttons. They could even customize the code, if they wanted. Wick is a powerful coding tool, and one thing I really appreciate is that it doesn’t require a login, which is very important for elementary students. Once they entered the website, I instructed the students to click the “Open” button in the top right corner and upload the template that I gave them. The template has a blank clock face, a simple character, a back button and two buttons with 0:00 on them for the two choices. The students used the drawing tools to draw hands on the clock, and I challenged them to pick a difficult time, instead of an easy one. Then they put the correct time on one button and an incorrect time on the other button. I explained that they should try to make the incorrect one “believable” by choosing a time that another student might guess, based on common mistakes (switching the hands, for instance). They could also move the buttons around and change their color by clicking on them. The students also double clicked the character to reveal three instances of it, and they used the drawing tools to make the first one look normal, the second one look excited and the third one look sad. Finally, they tested their projects to make sure they worked correctly and exported them as HTML files. I uploaded them to my website where you can see some student examples here.


Tags:


2nd Grade Time Books

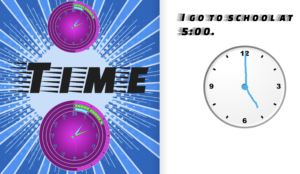
Second graders at Holladay Elementary have been learning about time (SOL2.9), so today students in Ms. Fournier’s class created a Time book with Book Creator. First we practiced telling time to the nearest five minutes with an analog clock online (other ones are here and here). We discussed the difference between AM and PM and the activities they would be doing at the different times. Next we went to Book Creator, and I showed them how to use the various tools: text, drawing, recording, camera and image search. I explained that they could use any of the tools they wanted to create their book. Each student made a title page with the word “Time” and a photo or two of clocks. For the next page, I gave them an image of a blank clock face that they could upload to their books. Then they used the drawing tools to draw a minute hand and an hour hand on it. They also typed a sentence telling the time and what they would be doing at that time. I encouraged the students to add extra pages to their books if they had time. One cool feature of Book Creator is the “Read to me” button at the top right. If you click it, a computer-generated voice reads the book aloud. This is a great feature to help students proofread their writing because they will hear when the voice reads something that doesn’t sound right. Finally, after the students finished their individual pages, I combined them all together into one class book that you can see here.


Tags:


2nd Grade Habitat Place Value Comics

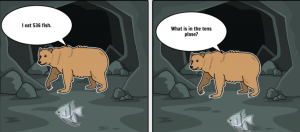
Second graders at Laburnum Elementary have been learning about place value (Math SOL2.1) and habitats (Science SOL2.5), so today, students in Ms. Brouillard’s class created comics showing an animal in its habitat discussing place value. First, students chose an animal and researched online to learn where it lives and what it eats. Some students even found out exactly how much food it eats (for example, you can ask Google, “How many fish does a bear eat each day?” or “How many pounds of bamboo does a panda eat each day?”). Then, we went to StoryboardThat and found some backgrounds that match the animal’s habitat. We dragged those into the comic panels, searched for our animal in the Characters tab and added it to the comic. Next, we added the food that the animal eats (using the Search feature if we couldn’t find it in Characters). The Textables tab is where the speech bubbles are found. Students added speech bubbles to the comic and typed one sentence about the animal including a 2-digit number and another sentence asking a place value question about that number. We saved our comics and shared them with our classmates on Schoology. Finally, we looked at each others’ comics and tried to answer the questions. You can see some student samples here.


Tags:


2nd Grade Thanksgiving Rounding

Second graders at Trevvett Elementary have been learning about Thanksgiving in Social Studies (SOL2.5h) and how to round two-digit numbers to the nearest ten in Math (SOL2.1d). Today students in Ms. Fletcher’s class created Google slideshows featuring Thanksgiving foods rounded to the nearest ten. First, we discussed their favorite Thanksgiving foods and why we might want to round the amounts. Rounding makes numbers easier to remember and use. It also helps with estimating. We reviewed how to round numbers down (if the ones place digit was 0, 1, 2, 3 or 4) and how to round numbers up (if the ones place digit was 5, 6, 7, 8 or 9). Then, we opened a blank Google slideshow and chose a theme. We typed a title and our name in the text boxes on the first slide, and I showed the students how to add another slide with the + button. We chose the “Big Number” slide template. In the smaller text box, the students typed a sentence telling how many items of a particular Thanksgiving food they had. They could choose any two-digit number they wanted, as long as it wasn’t already rounded. We typed the rounded number in the big text box. Since we wanted our classmates to solve our problems, I showed them how to add a transition to the number so it faded in later, revealing the answer only after the problem had been solved. Finally, we used the built-in Google image search to add a picture of the food. The students shared their slideshows on Schoology, but you can see them all here.


2nd Grade U.S. Symbols Place Value

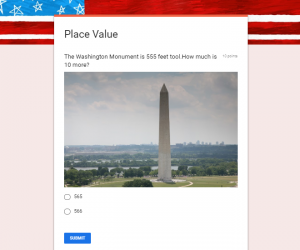
Second graders at Holladay Elementary have been learning about the U.S. symbols in History (SOL2.13) and how to calculate 10 or 100 more or less in Math (SOL2.1b). Today, students in Ms. Edmonds class created Google forms to review these concepts. First, each student chose a U.S. symbol to research (bald eagle, flag, Washington Monument, or the Statue of Liberty). They could use the Internet or books, and I instructed them to find a number related to their symbol. Some examples would be finding the height or weight of their symbol or identifying the number of objects on their symbol (stars, stripes, steps, etc.). Next, we went to our Google Drive and opened a New > Google Form. The students added a title, like, “Place Value.” Then they typed a problem to solve involving their symbol’s number and calculating 10 or 100 more or less. For the answer choices, they typed the right one and a few wrong ones. We discussed how to make the wrong choices tricky by thinking about common mistakes. If your question asks for 10 more, one of the wrong choices could be 10 less. I showed the students how to add an image of their symbol using the built-in Google image search. Finally, we went into settings and changed the form into a quiz, marked the correct answer, and shared the link on Schoology so our classmates could solve our problem. You can take a look at some student samples here.


2nd Grade Extreme Weather Skip Counting Maps

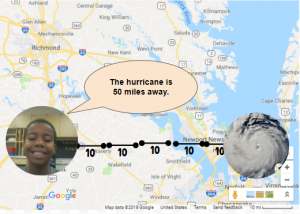
Second graders at Laburnum Elementary have been learning about extreme weather in Science (SOL2.6), skip counting in Math (SOL2.2a), and map skills in History (SOL2.1b). So today, students in Ms. Pope’s class reviewed all three concepts with a Google Drawing project. First, the students decided if they wanted to skip count by 2’s, 5’s, or 10’s, and they chose the corresponding template (you can copy each template by going here). Next, we right-clicked on one image holder and replaced it with a picture of some type of extreme weather (hurricane, tornado, blizzard, flood, etc.) using the “Replace image > Search the web” button. We added our own photo to the other image holder using “Replace image > Camera.” I encouraged the students to look surprised or scared in their photos since the extreme weather was heading their way! Now it was time to practice skip counting. We moved the map scale segments from the bottom to create a line showing the distance from the weather image to our photo. Then we skip counted the segments. Finally, we changed the words inside one of the speech bubbles to say something like, “The weather is ___ miles away.” You can see all their projects here.


2nd Grade “Mystery Me” Introductions

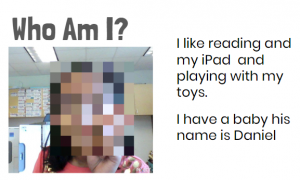
Second graders at Laburnum Elementary got to know each other better today with a fun “Mystery Me” activity. First, they went to Pixect and took a photo of themselves. Pixect is a great tool for taking quick webcam photos. It has an array of filters and timers available to use, but we just saved the photo and uploaded it to FacePixelizer, where the real magic happens. FacePixelizer is another great tool with many instructional uses. We used it today to pixelate our faces, but it can be used to make anything in a photo unidentifiable and mysterious: pixelate a book title, a weather instrument, or an animal, and students can try to guess what it is from various clues. It’s simple to use. Just click and drag across the area you want to pixelate. The amount of pixelation can be adjusted with a slider. Once we pixelated our faces, we downloaded the images and added them to a Google slideshow template that I gave them. The first slide was titled “Who Am I?” with two sentence starters: “I like…” and “I have….” The students completed the sentences with clues about themselves. On the next page they typed “I’m (Name)” and uploaded their original photo from Pixect. When they were finished, I combined all their slideshows together and added a Dissolve transition between them, so the pixelated photo gradually revealed the mystery student. You can see a few student samples here.


2nd Grade Coding Magnets

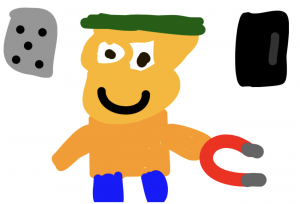
Second graders at Holladay Elementary have been learning about magnets and magnetism (SOL2.2), so today, students in Ms. Edmonds’ class used Wick to code a magnets activity. First, I showed them a finished sample so they could see what they would be creating. Basically, they will have a person, a magnet, and two objects–one that’s magnetic and one that’s nonmagnetic. Then, they will use code to make the person smile when the user clicks on the magnetic object and frown when the user clicks on the nonmagnetic object. We reviewed different objects that were magnetic and nonmagnetic, then we got started. The students used the drawing tools to draw a person, a magnet, and two objects. I showed them how to change the objects into buttons (click the finger icon) and we added some code to the buttons. I like how Wick uses real code, but they keep it simple by including a code library that students can choose from. So instead of typing the code, they just click it. Our code for the buttons read: mousePressed gotoAndStop(2) for the magnetic object and mousePressed gotoAndStop(3) for the nonmagnetic object. Next, we duplicated Frame 1 (right click on it) and changed the face in Frame 2 to be smiling. We did the same thing for Frame 3, but changed the face to be frowning. Finally, we tested our code to be sure it worked and clicked File>Export HTML. That’s it! They just created their own interactive magnets website, which is really impressive for 2nd graders! You can see all of their activities here.


Tags:


2nd Grade Counting Coins with Scratch

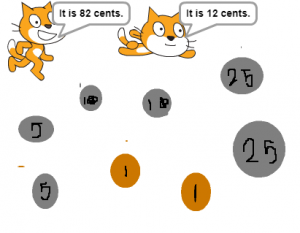
Second graders at Holladay Elementary have been learning how to count coins up to two dollars (SOL2.10a), so today, students in Ms. Brown’s class used Scratch to create a counting coins activity. First, we reviewed the coins and and practiced counting the value of groups of coins. Then I showed them a sample Scratch activity to prepare them for making their own project. Basically, it displays a group of coins with two characters stating different values. If you click on the character who correctly identifies the amount, they congratulate you with a “Good job!” or a similar statement. If you click on the character who is incorrect, they let you know you are wrong in a nice way by saying something like, “Try again!” Once the students got an idea of what they were doing, they were ready to begin their own activity. They started by editing the background and drawing a group of coins. They needed to make the coins easily identifiable by using the correct sizes, colors, and designs. Next, they chose two sprites, or characters, from the library. Using the block code, we programmed the characters to say a right and a wrong value and to let the player know if they chose correctly or incorrectly. Finally, we published our projects and shared the links on Schoology so our classmates could try our activities. You can try them yourself here.


Tags: