Category: 2nd Grade

2nd Grade Animated Famous Americans

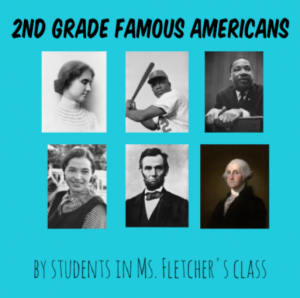
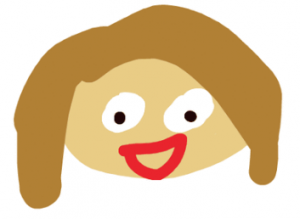
Second graders at Holladay Elementary have been learning about some of our famous Americans: George Washington, Abraham Lincoln, Helen Keller, Jackie Robinson, Martin Luther King, Jr., and Susan B. Anthony (SOL2.11). Today, students in Ms. Fournier’s class created animations of a famous American. First, they chose which person they wanted to animate and drew their face on ABCYa! Animate. We did some research online to make sure that we were drawing them correctly. We even asked Google about their hair color and eye color! Next, we used the copy cat button to make a copy of our picture and deleted the mouth. I showed them how to redraw the mouth in a new shape. We repeated the process for a few more pictures and changed the mouth into different shapes so it looked like the person was talking when we pressed the “Play” button. I explained that they could add additional realism by making the person blink or by making their ears and eyebrows move. When we were finished, we exported our animations as .gif files. Then, I showed them how to import their GIFs into WeVideo and add a voiceover to make it look like the person is talking. The voiceovers told about the famous American’s contributions and accomplishments. You can see their videos here. (UPDATE: Unfortunately, WeVideo recently changed their policy for free users so the video links expire after 90 days. However you can see another class’s animations without sound here).


1st & 2nd Grade Melting Matter

First graders at Holladay Elementary have been studying matter (SOL1.3), and they have learned that matter can be solid or liquid. Today, students in Ms. Milteer’s class created animations showing how a solid can turn into a liquid by melting. First, I showed them some time-lapse videos of various solids melting (ice cream, snowman, ice cube, butter, crayon, chocolate, candle). You may even want to record your own time lapse video of something melting. Many phones and tablets have a time lapse recording feature. Next, we went to ABCYa! Animate, and the students drew a solid object in the first frame. In the second frame, they drew the same object melted into a liquid. Then, we pressed play and slowed down the speed to watch our animations. Finally, we exported the projects as .gif files and shared them on Padlet). You can see them all here. UPDATE: Second graders learn about the states of matter as well (SOL2.3), so here are some student samples from a similar lesson I did with them using BrushNinja.


2nd Grade Probability Book

Second graders at Holladay Elementary have been learning about probability (SOL2.18) and predicting whether an outcome is likely or unlikely. Today, students in Ms. Edmonds’ class created a Probability Book with BookCreator. After reviewing several examples of probability, we logged into BookCreator with the teacher code and created a new book. On the first page the students added a text box and typed “Probability.” Then they added a photo of themselves using the built-in webcam feature. I also showed them how to change the background color. On the next page, they drew a group of different colored objects and typed a sentence like, “What is the probability of picking a yellow ___ ?” Finally, on the last page, they typed the answer (LIKELY or UNLIKELY) and added a photograph from the Internet. This gave them practice using the three different ways to get images in BookCreator (using the webcam, drawing, or uploading a photo). Once all their pages were finished, I combined them into one book and published the link on Schoology. Now, as they read their class book, they are reviewing probability and its terms in a fun way! You can read their book here.


Tags:


2nd Grade 3-D Habitats

Second graders at Holladay Elementary have been learning about animal habitats (SOL2.5b), so today, students in Ms. Brown’s class used CoSpaces to create 3-D models of different habitats. First we reviewed the habitats they have studied (desert, woodlands, grasslands, ocean, arctic, etc.), and they chose one they wanted to illustrate. Next, we went to CoSpaces, logged in with our Google accounts, created a new space, and chose an image from the Environment library that resembled our habitat. Then, the students needed to find plants and animals from the Objects library that would live in their environment. There are plenty of models to choose from, but students could also design their own using the 3-D shapes. I showed them how right clicking on an object presents a menu they can use to change its color, size and position. They clicked the speech bubble icon on one of the animals and wrote a complete sentence about that animal and its habitat. Finally, we published our model and shared the link with our classmates on Schoology. You can see them all here. v


Tags:


2nd Grade Famous Americans eBook

Second graders at Trevvett Elementary have been learning about famous Americans: George Washington, Abraham Lincoln, Susan B. Anthony, Helen Keller, Jackie Robinson, and Martin Luther King, Jr. (SOL2.11). Today, students in Ms. Fletcher’s class created an eBook (electronic book) about all of them. First, we reviewed the famous Americans, and they chose one whom they found most interesting. Then we spent about five minutes researching the person’s contributions. Students could use their notes, classroom posters, or a quick Google search to find relevant facts. Next, we logged into BookCreator using a class code. I showed them how to create a new book and customize the cover. We changed its color, typed a title (remembering to use uppercase letters), and added a photo of the person using the built-in Google image safe search. On the following page we recorded a video of ourselves telling about the famous American’s accomplishments. Although video is a fantastic feature of eBooks, I’ve found that it doesn’t work well in BookCreator. The videos just seem to load and load and load… and never play. Be aware of that issue if you try it with your class. On the last page we typed a complete sentence about our person and used the drawing tools to draw a picture of them. Finally, I combined all the students’ individual books together into one big book. You can read it here. Be sure to check out BookCreator’s newest feature, “Read Aloud.” When you press the button, a computerized voice will read the book aloud. It’s a great way for students to recognize spelling and grammar mistakes.


2nd Grade Seasonal Adaptations Comics

Second graders at Trevvett Elementary have been learning about ways that animals adapt to the changing seasons (camouflage, hibernation, migration, etc.)(SOL2.7a). Today students in Ms. Myers’ class created comics showing an animal of their choice adapting to the fall, winter, and spring. First we discussed different types of animals and what they do in winter. I demonstrated how to do a Google search if they didn’t know what their animal does. For example, I asked Google, “What to ladybugs do in winter?” (ANSWER: They hibernate in groups). Once we had our information, we went to StoryboardThat to make our comics. Since there are three panels in the comic, we made the first one fall, the second one winter, and the third one spring. The students dragged down scenes to represent their animal’s habitat. I showed them how to click the blue “Edit Scene” button to change the weather for the seasons. Next we clicked the Characters tab and went to Animals to find our animal. The Animals have an “Edit Pose” button that could be used to put the animal into different positions and change its colors. Finally we added “Textables,” or speech bubbles, with complete sentences explaining what the animals do to adapt to the different seasons. To save our comics, we took a screenshot using the Snipping Tool, then posted them to Schoology. You can see them all here.


Tags:


2nd Grade American Indian Homophones

Second graders at Holladay Elementary have been learning about American Indians in History (SOL2.2) and homophones in English (SOL2.7a). Today, students in Ms. Fournier’s class chose an Indian tribe (Powhatan, Lakota, or Pueblo) and thought of homophones that they might say (if they spoke English). First, we opened Pixie and used the paint brush and paint bucket tools to draw the correct environment for the tribe we selected (woods for Powhattan, plains for Lakota, desert for Pueblo). Next, we used Stickers to add examples of people, animals, houses, and tools to represent the tribe. Before we wrote the homophone sentence, we brainstormed a list of possible homophones to use. Then the students chose a homophone pair to include in a sentence about their tribe. We exported the images as JPG files and shared them in a Schoology album. You can see a few student examples here.


Tags:


2nd Grade Ordinal Numbers

Second graders at Trevvett Elementary have been learning about ordinal numbers (SOL2.2), so today students in Ms. Smith’s class created ordinal number questions for their classmates to solve. First, we used to Google’s Autodraw to draw a series of objects. AutoDraw can guess what you are drawing and offer suggestions. For example, if you draw a rough circle, it will provide a perfect circle to replace it with, or it may suggest an orange, a ball, or a wheel. So it’s a great way for students to practice their drawing skills without worrying about being perfect. I explained that their series of objects needed to be in one straight line so their classmates could tell the ordinal positions correctly. Then we used the text tool to type a question. They could either give the position of an object and ask for its identity (“What is in the 3rd place?“) or they could name the object and ask for its position (“In what place is the apple?”). When they finished, the students downloaded their images and shared them in an album on Schoology. Now they can answer each other’s questions in the comments or Ms. Smith can present them on the projector for a review. You can see them all here (and here’s a link to Mr. Gunter’s class at Holladay, who did the same project).


2nd Grade Time Movies

Second graders at Holladay Elementary have been learning how to tell time to the nearest five minutes (SOL2.12), and today students in Ms. Brown’s class created videos about time using WeVideo. WeVideo is bandwidth intensive, so in order to reduce the number of computers accessing the website, the students worked in pairs. First, we signed into WeVideo with our Google accounts. I showed them how to create the title page and pick a theme. Since the theme music is usually too loud, we turned the volume down to 50% (at the bottom). Next we used the record button to record our introductions with the built-in webcam. For the content, I instructed the students to find images of clocks showing a specific time (they did a Google image search for “8:30,” for example). They also searched for pictures showing an activity they would be doing at that time (eating, sleeping, going to school, etc). We uploaded our images to WeVideo and arranged them in the order we wanted them in the timeline. Then the students recorded a voiceover explaining the time and the activity. I showed them how to increase the volume of their voiceovers to 150%. Finally, we published our videos and pasted the links to Google classroom so everyone could watch them. You can see them here.


Tags:


2nd Grade Student-Created Money Quizzes

Second graders at Holladay Elementary have been learning how to count and compare a collection of pennies, nickels, dimes, and quarters whose total value is
$2.00 or less and correctly use the cent symbol, dollar symbol, and decimal point (SOL2.10). Today they created their own money quizzes using Google Drawings and Google Forms. First we had to use Google Drawings to create the image of money to use in our quiz. We went to our Google drive and clicked New > More > Google Drawings. Then we clicked the Image button and clicked “Search” to find pictures of the bills and coins we needed. I explained that students could make any amount of money up to $2.00, but they had to know how much money it was for their quiz. When the students were finished making their money picture, we clicked File > Download As > JPEG Image. Then we went back to our Google Drive and clicked New > More > Google Forms. They titled their form, “Money Test” and wrote the question, “How much money is this?” Next, they typed in several answer choices, making sure to include the correct one. We also clicked the Add Image button to upload the money drawing that we created. Finally, to turn the form into a quiz, we clicked Settings (the gear icon) > Quizzes and changed it to a quiz (you may want to change some of the other settings as well). We marked the correct answer choice, clicked “Send,” copied the link, and pasted it to Google classroom so everyone could take our quizzes. You can see them all here. (NOTE: I taught a similar lesson with Mr. Williams’ 5th graders at Varina Elementary where we created quizzes for finding perimeter, area, and volume here)