Tag: webtools

5th Grade Memory Walls

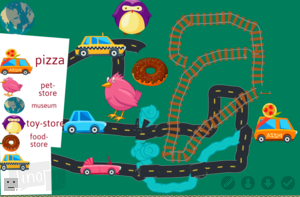
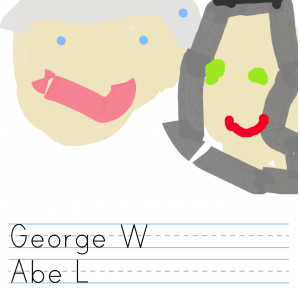
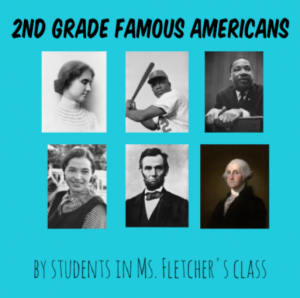
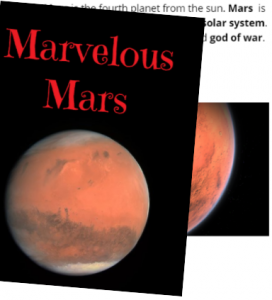
Fifth graders in Ms. Haislip’s class had a great year this year and wanted to remember it by creating a memory wall. There are numerous web tools you could use for a project like this, but today we used DesignCap. It’s a free resource that doesn’t require a sign-in, so it’s quick and easy to use, plus, it has many great features that I’ll describe below. In preparation for this project, Ms. Haislip uploaded photos from the school year to a Google folder and shared the link with her students on Schoology. Each student downloaded the pictures they wanted to use, then uploaded them to DesignCap using the Photo > Add Photo link. Next, they dragged the photos to the poster, rotating and resizing them until they were arranged the way they wanted. We used the Background tool to design a colorful background with gradients, and I showed them how to use the Text tool to add a title and captions to each photo. The text tool on DesignCap is quite robust, providing options for font, fill color, outline color, glow color, and transparency! The students practiced typing complete sentences with correct capitalization and punctuation for their photo captions (which is still a challenge, even for fifth graders). When we were finished, we clicked the Save button and selected the medium size. DesignCap projects can be saved in a variety of sizes up to the very generous XLarge size of 2478 x 3506 pixels. Finally, we uploaded our files to Schoology so we could enjoy viewing each others’ memory walls. You can take a look at them all here.


3rd Grade Animated Food Chain Relationships

Third graders at Holladay have been learning about the relationships among organisms in aquatic and terrestrial food chains (SOL3.5), so today, students in Ms. Haley’s class created animations with Loopy to illustrate some of those relationships. First, we reviewed the different ecosystems: forest, desert, arctic, freshwater, ocean, etc. Then, students chose one ecosystem and typed the name of it in Loopy using the Text tool. Next, they used the pencil tool to draw a circle to represent a plant. If students didn’t know a plant that lived in their ecosystem, I showed them how to ask Google using the microphone. Next, students added an animal that eats that plant. Again, they could use Google for research. A great feature of Loopy is that it can show positive or negative relationships with arrows. We drew an arrow from the plant to the animal and discussed whether it should be positive or negative. It’s positive because more plants would mean more animals since they have a bigger food source. Then, we drew another arrow from the animal to the plant and made it negative (click the box in the upper right corner). It’s negative because more animals would mean less plants since they eat them. Students could continue adding animals to their web and using arrows to show the relationships between them. Finally, we pressed play and explored what happens when we change the population of each organism (by pressing the up or down arrows). We saved our animations as weblinks and shortened them with bitly. You can see them all here.


4th Grade Geometry Posters

Fourth graders at Varina Elementary have been learning about lines, rays, angles, polygons, and other aspects of geometry (SOL4.10, 4.11, 4.12). Today, students in Ms. Connell’s class used DesignCap to create geometry posters that review these concepts. We started by looking at the sample posters (templates) on the website for inspiration. We noticed that many of them have large text and colorful pictures to convey a clear message. I encouraged the students to try to use similar design elements. Then, we began with a blank poster and changed the background color. I demonstrated how to add text with the text tool and customize the font, size, fill and border colors. Next, I showed them how to add images and clipart by searching the web or using the built-in clipart library. Students used these tools to create posters reviewing geometry concepts of their choice. We exported them as JPG files and shared them on Schoology. You can see all their posters here.


1st Grade Maps

First graders at Trevvett Elementary have been learning about maps (SOL1.4) and how to make maps with symbols and a legend (SOL1.5). Today, students in Ms. Robinson’s class created their own maps with ABCYa! Paint. First, we drew some land and water features. Next, we used the rainbow brush to paint roads, railroads, and rivers on our map. I explained that rivers usually flow into the ocean and roads and railroads need to go to different parts of the land. Then we looked at the stickers and discussed what they could symbolize. For example, a loaf of bread could be a symbol for a bakery and the Earth could be a symbol for a science museum. They added sticker symbols to their map, and they also added them to their map legend. The last step was to use the text tool to type words next to the symbols in the legend, explaining what they mean. We saved our maps and uploaded them to a Lino board (it’s similar to Padlet, which recently changed its policy for free accounts). You can see their finished maps here. (UPDATE: I taught a similar lesson in Ms. Shelly’s class at Holladay, and you can see their maps here).


Kindergarten Presidential Portraits

Kindergarten students at Trevvett Elementary have been learning about Presidents Day and the two presidents it honors: George Washington and Abraham Lincoln. Today, students in Ms. Gouldman’s class painted presidential portraits based on research. Yes, even kindergarten students can start learning how to do research. I explained that we wanted our portraits to look like the real presidents, so we had to find out what color their skin, eyes, and hair were. First I asked them to guess, then we looked online for portraits and photographs to confirm or revise our initial thoughts. It was difficult, though, to tell some of the colors from just paintings or black and white photos, so I showed them how to ask Google a question with the microphone button. “What color were George Washington’s eyes?” I asked, and the answer came back: blue grey. Then the students tried it with Abraham Lincoln. We discovered that his eyes were green or grey or hazel (that type of eye color fluctuates depending on the light). We already knew that Abraham Lincoln sported a beard, but we learned that George Washington had light brown or reddish hair, and powdered it so it appeared white (it was a military thing, like a modern day buzz cut). As we looked at the different websites in our research, I explained that some sites are reliable, and some are not. I pointed out that anyone can make a website, in fact, they will be making a sort-of website today, actually. Our website won’t be reliable since we are not professionals, but websites like encyclopedias or museums or scientific organizations are usually reliable, especially when they agree with each other. Now that we had our facts, we went to ABCYa! Storymaker to paint our portraits. The students had already practiced drawing on the computer this year, so that part didn’t take too long. It was a perfect time to teach some typing skills. Storymaker makes typing seem easy and familiar by including elementary lined paper (press the yellow button on the right). I showed the students how to use Shift to make an uppercase letter, and we typed the presidents’ first names. Finally, we exported our pictures and shared them on a Padlet, which is their own “sort-of” website that Ms. Gouldman can send home to parents.


5th Grade Physical & Chemical Changes

Fifth graders at Laburnum Elementary have been learning about how matter can change physically or chemically (SOL5.6), so today, students in Ms. Hall’s class created animations to illustrate some of these changes. First, we reviewed the differences between physical and chemical changes and looked at some examples. Then, the students chose a type of change they wanted to animate, and I explained how to download a suitable background image with a Google image search. Next, we went to ABCYa!Animate to create our animations. We clicked the “Edit Background” button and uploaded our background image. Then, we used the paint tools or the image library to create our first frame. I demonstrated how to copy the frame and make small changes in each subsequent frame so that when they press “Play,” it shows matter changing over time. When we were finished, we exported our animations as .gif files and shared them on Schoology. You can see them all here.


4th Grade Social Studies Videos

Fourth graders at Laburnum Elementary have been reviewing the regions of Virginia (VS.2b) and famous people from the Civil War era (VS.7c), so today Ms. Mayer’s class created Social Studies videos on these topics to help them review. First, they chose a partner to work with and decided together on a Virginia region or a Civil War person to research. Next, we spent a few minutes looking over our notes and finding information online to share. I showed them how to download and save online images about their topic to use in their video. Then we logged into WeVideo to begin making our movies. WeVideo starts out in Timeline mode, which is a little complicated, so we switched to the simplified Storyboard Mode (click the three lines in the top left). Storyboard Mode already has a Title page set up in the timeline. We clicked the Edit icon on the Title page and typed our title, remembering to use capital letters. Now it was time to record our intro. I guided them through the process of installing the webcam extension and modeled how to record an effective intro (speak loudly with enthusiasm while stating your names and your topic). After the students had recorded themselves, we uploaded the pictures we had saved and dragged them into the movie timeline. The students planned what they would say about each image, but before they recorded their voiceover, they chose their Theme by clicking the magic wand icon. I found that it is helpful to choose the theme before recording the voiceover because the theme sometimes changes the duration of the video. Just be sure to mute the audio while recording the voiceover so it’s not playing while you are recording. The students recorded their voiceovers, providing facts about each picture. Finally we published our videos and shared the links on Schoology. You can see them all here.


2nd Grade Famous Americans eBook

Second graders at Trevvett Elementary have been learning about famous Americans: George Washington, Abraham Lincoln, Susan B. Anthony, Helen Keller, Jackie Robinson, and Martin Luther King, Jr. (SOL2.11). Today, students in Ms. Fletcher’s class created an eBook (electronic book) about all of them. First, we reviewed the famous Americans, and they chose one whom they found most interesting. Then we spent about five minutes researching the person’s contributions. Students could use their notes, classroom posters, or a quick Google search to find relevant facts. Next, we logged into BookCreator using a class code. I showed them how to create a new book and customize the cover. We changed its color, typed a title (remembering to use uppercase letters), and added a photo of the person using the built-in Google image safe search. On the following page we recorded a video of ourselves telling about the famous American’s accomplishments. Although video is a fantastic feature of eBooks, I’ve found that it doesn’t work well in BookCreator. The videos just seem to load and load and load… and never play. Be aware of that issue if you try it with your class. On the last page we typed a complete sentence about our person and used the drawing tools to draw a picture of them. Finally, I combined all the students’ individual books together into one big book. You can read it here. Be sure to check out BookCreator’s newest feature, “Read Aloud.” When you press the button, a computerized voice will read the book aloud. It’s a great way for students to recognize spelling and grammar mistakes.


3rd Grade Loopy Cycles

Third graders at Holladay Elementary have been learning all about cycles: animal life cycles, plant life cycles, seasons, and the phases of the moon (SOL3.8). Today students in Ms. Ambrose’s class used a website called Loopy to demonstrate how one of these cycles works. First we reviewed the steps in each cycle and pointed out that most of them have four parts. The students could choose which cycle they wanted to illustrate. I explained that a cycle is kind of like a circle because it continues around and around. Then we went to Loopy and I showed them how to create each step of the cycle by drawing circles and labeling them. The students could also change the colors of each circle. Next, we drew arrows to show the order and relationships between each step. We discussed why the order was important. Could the steps happen out of order? The way Loopy works is you click up or down arrows in each circle and see how having more or less of that part influences the other parts (it was designed to study simulations). So it illustrates life cycles best. If there are more eggs there will be more butterflies or frogs, but if the number of eggs goes down, so does the number of adults. You can change the relationships, too, by making the arrows positive or negative. That would be great for illustrating food chains and food webs (if there are more predators, there would be less prey – a negative relationship, but if there are more prey, there would be more predators – a positive relationship). When we were finished, we published our Loopy projects, and it provided a link to shorten with Bit.ly. We shared our links on Schoology, but you can see them all here.


4th Grade Planet Books

Fourth graders at Holladay Elementary have been learning about the planets in Science (SOL4.7), and they have been identifying nonfiction text structures in Language Arts (SOL4.6a). Today, students in Ms. Anthony’s class used BookCreator to make books about the planets with nonfiction text structures. First, they chose a planet to research and spent a few minutes exploring websites and books about the planet. Next, we reviewed nonfiction text structures they observed in their research: bold print, photos, captions, diagrams, etc. I explained that they would need to include some of those features in their planet book. We signed into Book Creator with our Google accounts and entered the teacher’s class code. Then they clicked the “New Book” button to get started. I showed them how to add text with the + button and how to modify the text font, size and color with the i button. They made their important words bold. We also added images with the built-in image search and typed captions. Some students took photos and video with the webcam feature, but we found that those seemed to take a long time to load. Hopefully that feature gets upgraded in the future. We didn’t use the drawing tool, but that is also available. Finally, we published our planet books, and I linked them all into one book. You can read their finished book here.