Tag: video

2nd Grade Time Movies

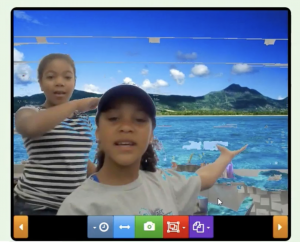
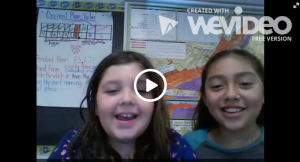
Second graders at Holladay Elementary have been learning how to tell time to the nearest five minutes (SOL2.12), and today students in Ms. Brown’s class created videos about time using WeVideo. WeVideo is bandwidth intensive, so in order to reduce the number of computers accessing the website, the students worked in pairs. First, we signed into WeVideo with our Google accounts. I showed them how to create the title page and pick a theme. Since the theme music is usually too loud, we turned the volume down to 50% (at the bottom). Next we used the record button to record our introductions with the built-in webcam. For the content, I instructed the students to find images of clocks showing a specific time (they did a Google image search for “8:30,” for example). They also searched for pictures showing an activity they would be doing at that time (eating, sleeping, going to school, etc). We uploaded our images to WeVideo and arranged them in the order we wanted them in the timeline. Then the students recorded a voiceover explaining the time and the activity. I showed them how to increase the volume of their voiceovers to 150%. Finally, we published our videos and pasted the links to Google classroom so everyone could watch them. You can see them here.


Tags:


5th Grade Light & Sound Animations

Fifth graders at all my schools have been learning about light (SOL5.3) and sound (SOL5.2), so these past few weeks we have been using ABCYa!Animate to illustrate light and sound waves. First we reviewed waves, frequencies, and amplitudes using a variety of websites: IKnowThat, Virtual Oscilloscope, Wave On A String, Digital Keyboard, Bouncy Balls, and the Interactive Ear. We also discussed how waves can be reflected or refracted. Students had to choose one of these principles to illustrate in their animation. We went to ABCYa!Animate, and I showed them how to choose a background image or use the square tool to make a solid-colored background. Next, they chose images from the Images library or drew their own images with the paint tool. Once they finished their first frame, I explained how to copy the image with the Copy Cat button and move things around a little bit or add things in each subsequent frame to give the illusion of motion. We also used the Text tool to write labels or descriptive sentences. You can see their light animations here, their sound animations here, and some students combined light and sound in the same animation. You can see those here. (NOTE: Ms.Sharpe’s class had already created animations this year, so we tried something different–movies with WeVideo).


4th Grade Measurement Movies

Fourth graders at Trevvett Elementary have been learning how to estimate and measure length in both metric and U.S. customary units (SOL4.7). Today students in Ms. Town’s class created measurement movies using WeVideo. First we reviewed the different customary units of measurement from smallest to largest (inches, feet, yards, and miles), and we reviewed the metric units (millimeter, centimeter, meter, kilometer). Then I explained that they would create movies about the units with a partner or by themselves. Each group chose a unit until all the units were chosen. The students logged into WeVideo with their Google accounts and created a new video project. I outlined three main requirements for the video: (1) introduce themselves, (2) describe their unit of measurement, and (3) give examples of objects that would be measured by that unit. For the first two parts, students used the built-in webcam to record their video directly to WeVideo. For the third part, students had to do some research online and find images of appropriately-sized objects. They downloaded their images to the desktop, then imported them into WeVideo. Finally, we selected themes with music, and I showed them how to adjust the volume so the music wasn’t too loud. We published our videos and pasted the links into Schoology so our classmates could watch them and comment on them. You can see them all here.


Tags:


4th Grade Animated Revolutionary War Heroes

Fourth graders at Trevvett Elementary have been learning about Revolutionary War heroes like Thomas Jefferson, George Mason, Jack Jouett, and James Armistead Lafayette (VS.5, VS.6). Students in Ms. Adamonis’ class have each chosen a person to research and have prepared a written speech for the person describing his life and actions. Today we took their speeches and created animated faces using SitePal, so it looks and sounds like the famous heroes are actually talking. First we did a Google image search to find an image of the person. The best images are the ones where the person is facing forward. For people who don’t have a portrait online (like Jack Jouett) we searched for a Revolutionary War era/colonist costume model. Next we uploaded the image to SitePal (click Demo > Classic Demo > 3D > Create Your Own) and followed the directions to mark the eyes, nose, ears, chin, and mouth (this is important for the animation to look realistic). Then we clicked the “Audio” button and chose “TTS” (Text to Speech). We either copied and pasted our speech from our original document or typed it in the box. We chose a voice and an accent, then previewed it to be sure everything sounded correct. SitePal really helps with punctuation and spelling because you can hear right away when something isn’t right. Finally we used Screencastify to record our video and save it to our Google drive. We posted the links to Schoology, but you can take a look at some student projects here.


5th Grade Cereal Box Book Report Videos

Fifth graders in Ms. Catlett’s class at Trevvett Elementary have been working on cereal box book reports (SOL5.2 & 5.3). If you want to learn more about the project and the rubric used to evaluate it click here. My job was to show them how to create a video for their project. We used WeVideo, and signed in with their Google accounts. The students clicked “Create a new video,” and we switched to Storyboard Mode (click the three lines in the top left corner). Then we clicked the “Title” slide in the bottom and edited it by clicking the pencil icon. I showed them how to do a Google image search for their book cover. We downloaded it from the Internet (right click on the image and click “Save image as…”), then we uploaded it to WeVideo (click the green cloud icon). Next the students clicked the red record button, installed the WeVideo extension, and recorded themselves describing their book and their cereal box. When they were finished, they added a text slide with “The End.” Finally, we clicked the Themes button and changed the theme of the movie. Each theme has its own accompanying music, so we had to turn that down using the volume slider in Timeline Mode (click the three lines in the top left corner again). To publish the videos, we clicked “Finish” and copied the link into Google classroom. You can see them all here.


5th Grade Ocean Tours

Fifth graders at Holladay Elementary have been studying the ocean floor in Science (SOL5.6), so today students in Ms. Haislip’s class created undersea tours with Google Earth and Screencastify. First we opened up Google Earth and I showed them how to put placemarks on the different features (continental plain, continental slope, continental rise, abyssal plain, trench, ridge, seamount, etc). I also demonstrated how they could go “underwater” and change the angle of the view by clicking and dragging the wheel in the top right corner. Once their view was just right, they clicked the yellow thumbtack button to add a labeled placemark on the spot. The placemarks appear in a list on the left side under “My Places.” When the students double-click a placemark from the list, Google Earth automatically takes them to that same view that was saved. Once all the placemarks had been created, it was time to record the tour using Screencastify. Screencastify is a Chrome extension that records the screen and lets you add an audio voiceover. Students worked with partners to “travel” around the ocean floor describing each feature. Screencastify saves the videos to Google drive, so it was easy to copy and paste the links from there to Google classroom. You can take a look at some of their projects here.


5th Grade Green Screen Videos

Fifth graders at Trevvett Elementary have been studying the ocean (SOL5.6), so today students in Ms. Adamonis’ class created green screen videos about the ocean. A green screen allows you to place a different image behind the speaker, making it look like the speaker is standing in or near the ocean, for example. It was a challenge finding a free web tool for making green screen videos (if you know of any, please let us know in the comments). There are several mobile apps that can do it, and Mac computers can do it with Photo Booth (see a similar lesson taught using Photo Booth here), but we needed something we could use on our Dell laptops. Finally I found this, which seemed to work pretty well. Our next challenge was making the green screen background. We used colored plastic tablecloths, but it’s actually better if you have something more permanent and smooth, like a solid colored wall or bulletin board. In order to use this webtool, you need to activate your webcam by following the prompts, then you click on the background and adjust the sliders at the bottom until it looks good (adequate lighting helps a lot). We used Screencastify to record our videos. Screencastify saves the videos to your Google drive, making it easy to share the links. You can see a couple of student examples here.


4th Grade Jamestown Videos

Fourth graders at Holladay Elementary have been learning about Jamestown (VS.3) and many of them have been on field trips there, so today students in Ms. Rivara’s class created Jamestown videos. They used WeVideo to create their movies. Since this was the second time they’ve used it (their first time is here), their skills improved. We worked with partners again, since WeVideo works better when less computers are online. First we clicked the red record button and filmed our intro. Then the students searched for photos of Jamestown to use in their movie. They uploaded the photos and arranged them in order on the timeline. Next, they pressed the microphone button and recorded a voiceover explaining the photos. Finally the students selected a theme with music. We had to turn down the volume of the music on the timeline and turn up the volume of the voiceover in order to hear it. The students published their videos and posted the links to Google classroom. You can watch some of their videos here.


Tags:


5th Grade Scientific Method Videos

captureFifth graders at Holladay Elementary have been studying the steps in the scientific method (SOL5.1). One of their teachers, Ms. Haislip, emailed me asking if I could show them how to make a video reviewing the steps. Since the lesson was only one hour, I decided to focus on the most difficult step – identifying the independent and dependent variables (SOL5.1e), then they could add the other steps later. First we got into pairs, and I showed them how to log into WeVideo with their Google accounts. We switched over to Storyboard mode using the three lines menu in the top left corner since that’s easier than Timeline mode. Each pair of students brainstormed ideas for an experiment they’d like to do and typed the title in the Title clip of the storyboard. Next we used the record button to record their intro. They had to introduce themselves and explain the purpose of their experiment. Then they opened a new tab and searched for an image to represent their experiment. They downloaded the image and added it to their video timeline. I showed them how to record a voiceover for the photo, identifying the dependent and independent variables. Students had to convey their understanding that the independent variable is the one that the scientist changes and the dependent variable is the one that responds to the change. Finally the students added a theme with music and published their videos. We posted the links to Google classroom, but you can see some student samples here.


Tags:


4th Grade Virginia Indians Videos

pasted-image-0Fourth graders at Holladay Elementary have been learning about the Virginia Indians (VS.2d), so today I showed students in Ms. Tonello’s class how to make videos about a Virginia Indian group using WeVideo. First they picked a partner to work with because WeVideo puts a bit of strain on the wireless bandwidth. Next, we logged in with our Google accounts and switched to Storyboard mode (since it is easier for beginners). Each pair chose a Virginia Indian group (Powhatan, Monacan, Cherokee) and typed the name of their group on the title clip. Then they clicked the red record button and recorded their introduction video. I showed them how to drag their video down from the media frame into the storyboard frame. Next, we opened a new tab and searched for a map of Virginia to include in our video (most used this one since it was part of the Wikimedia commons). They used the Snipping Tool to take a screenshot of the map, and they used the pen tool to circle where their Indian group lived. Then students uploaded the map to their video project and recorded a quick voiceover using the microphone button. We switched to Timeline mode in order to drag the voiceover to match up with the map. Finally we clicked the Themes button and chose a theme with music. We discovered that we needed to turn down the volume of the music track or we couldn’t hear our voices. That’s all we had time for today, so we posted our links to Google classroom with the hopes of finishing them later. Check out a few student examples here.


Tags: