Category: 5th Grade

5th Grade Planet Websites

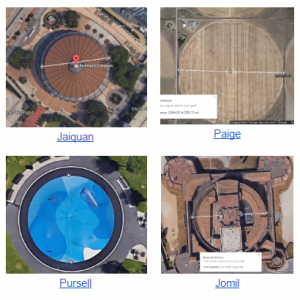
Fifth graders at Varina Elementary have been reviewing the planets in our solar system (SOL4.7), so today students in Ms. Primrose’s class researched a planet of their choice and created a website about it using the new Google sites. First we reviewed the planets, their order, and interesting facts about each one to get the students thinking. We discussed how the Earth is unique in space, and is not named after a god. The other planets are mostly named after Roman gods, except Uranus, which is named after a Greek god. (By the way, did you know Uranus was first named after King George)? After the students chose a planet that interested them, they conducted their research online. There are several good sites, but the ones we used are ESA Kids (good facts, written at on elementary reading level), Solar System Scope (an interactive, animated solar system), and the basic Google search page. Other websites sites that your students can explore in a center or station are PixelSpace (shows the vast scale of the solar system if the moon were the size of a pixel); Scale of the Universe (shows not only the relative sizes of the planets, but many other objects in the universe), and Neave Planetarium (shows students where the planets and constellations are in the sky tonight). Next, it was time to create our website using Google sites. Students went to their Google drive and clicked New > More > Google sites. The students typed a creative title for their planet webpage, then typed some facts in their own words (we discussed the problems with plagiarism). Finally, students added photos using the built-in Google image search. We published our websites, and shared the links on Google classroom. You can see them all here.


5th Grade Light & Sound Animations

Fifth graders at all my schools have been learning about light (SOL5.3) and sound (SOL5.2), so these past few weeks we have been using ABCYa!Animate to illustrate light and sound waves. First we reviewed waves, frequencies, and amplitudes using a variety of websites: IKnowThat, Virtual Oscilloscope, Wave On A String, Digital Keyboard, Bouncy Balls, and the Interactive Ear. We also discussed how waves can be reflected or refracted. Students had to choose one of these principles to illustrate in their animation. We went to ABCYa!Animate, and I showed them how to choose a background image or use the square tool to make a solid-colored background. Next, they chose images from the Images library or drew their own images with the paint tool. Once they finished their first frame, I explained how to copy the image with the Copy Cat button and move things around a little bit or add things in each subsequent frame to give the illusion of motion. We also used the Text tool to write labels or descriptive sentences. You can see their light animations here, their sound animations here, and some students combined light and sound in the same animation. You can see those here. (NOTE: Ms.Sharpe’s class had already created animations this year, so we tried something different–movies with WeVideo).


5th Grade Circles On The Earth

Fifth graders at Laburnum Elementary are learning about circles and their measurements: circumference, diameter, radius, and chord (SOL5.9). Today students in Ms. Henry’s class learned how to show those measurements with Google Drawings and Google Earth. First I gave them each a copy of a blank Google slideshow in Google classroom. We created a title page on the first slide, and on the second slide I showed them how to use the shapes tool to make 4 circles (hold Shift while clicking and dragging the circle to make it perfectly round). We used the paint bucket tool to change the fill color of the circles, and they discovered another new feature that I didn’t know about (I already mentioned in this post, how students found the gradient feature). If you click Custom at the bottom of the colors panel, you can adjust the fill colors’ transparency! Next, I showed them how to use the Line tool to draw a radius, diameter, and chord on different circles. We changed the color of the lines and their thicknesses using the buttons in the toolbar. Then we labeled each measurement with a text box. For the last slide I wanted them to find a real life circle in Google Earth and measure its radius, diameter or a chord. So we went to Google Maps, clicked the Google Earth button in the bottom left corner, and searched for circles. TIPS: Look near rivers for water treatment plants, look out west for crop circles (the panhandle of Texas especially), look on the roofs of buildings for fans, look in backyards for pools and trampolines. To make a measurement, right click where you want the line to start, choose “Measure distance,” then double-click where you want the line to end. Finally, students took a screenshot of their real life circle (using the Snipping Tool) and pasted it to their slideshow with a text box explaining the measurement. You can see all their slideshows here.


5th Grade Midwest Region Comics

Fifth graders at Trevvett Elementary have been learning about the regions of the United States this year, and they are currently focusing on the Midwest Region. Today students in Ms. Adamonis’ class created comics about the Midwest using StoryboardThat. First, we spent a few minutes researching the Midwest (SOL5.9). I encouraged them to look for interesting facts that their classmates may not already know. Some key words to use in search engines are: midwest + interesting facts, fun facts, interesting places, landmarks, trivia, etc. We also discussed how to double check their facts and evaluate the reliability of websites, since we found some “facts” that weren’t true (like roller skates weren’t actually invented in the midwest as this site claimed). Next, the students chose three of the most interesting facts to illustrate in their comic. We went to StoryboardThat and created a new comic with three panels (one for each fact). I explained that they should create their comic like a storyboard for a tv show or a documentary. The students chose different backgrounds and characters and customized them using the blue “Edit” button. Then they added speech bubbles (textables) and typed the facts they discovered in their research. Finally, we took screenshots of our comics and uploaded them to CoMemories. We have been using Schoology albums to share our work, but we found that comics do not display large enough in this format, so that’s why we chose CoMemories instead. You can see all their midwest comics here.


5th Grade Shapes with Google Drawings

Fifth graders at Varina Elementary have been learning about 2-D shapes: parts of a circle (SOL5.9), angles and triangles (SOL5.12), and plane figures (SOL5.13). Today, students in Ms. Shiew’s class used Google Drawing to illustrate a variety of these shapes. First we went to their Google drive and clicked New > More > Google Drawings. I showed them how to use the Shapes tool to create a shape then use the paint bucket to change the fill color. The students actually found a new feature I hadn’t seen before–you can now have a gradient fill! I also showed them how to use the line tool to create congruent markers on equal sides of the shapes or to add chord, diameter, or radius lines to the circle. They used the editing tools to change the color, thickness, and endpoints of the lines (and shape outlines). To label the endpoints, students used the text box tool and typed letters. Finally, we clicked File > Download As > PNG Image. I explained that one difference between PNG and JPG images is that the PNG image will have a transparent background. We shared our images on Google classroom with questions for our classmates to answer, like “What is the line AB on the circle?” or “What type of triangle is in my picture?” You can see all their shapes here.


5th Grade Habitat Stem and Leaf Plots

Fifth graders at Holladay Elementary have been learning about stem and leaf plots and line graphs in Math (SOL5.15), and they have been studying ways to classify animals and plants in Science (SOL5.5). Today students in Ms. DiMatteo’s class created stem and leaf plots and line graphs about the populations of animals and plants in different habitats. First I gave each student a copy of this Google spreadsheet (you can make a copy by clicking File > Make a copy). They clicked the arrow in box A1 and chose a habitat from the drop down list. Depending on the habitat they choose, a list of animals and plants appears. Google now has emojis (click Insert > Special Characters > Emoji), so that’s where I got the images. Next the students had to identify each one as an invertebrate, vertebrate, vascular or non-vascular plant. I tried to include at least one of each kind. (You will notice as you edit the spreadsheet the counter numbers change, that’s supposed to happen). Next the students acted like scientists and recorded the data for each year by typing the number in the counter box at that moment. The numbers have conditional formatting rules that will turn them different colors based on their tens digits (to help with the stem and leaf plot). To create the stem and leaf plot, the students type the numbers 1-9 in the Stem column (column H), and record the ones digits in the Leaf column (column I). To create the line graph, the students highlight the data in rows D-G and click the graph/chart button. Then they click the “Chart Types” tab in the window that appears and choose a line graph. They also need to check the box that says, “Switch rows/columns” so each line shows a specific living thing. Finally, I showed them how to customize the colors, titles, and labels of their graphs by clicking on each one. As we looked at our data, we discussed why there were more of the smaller creatures and less of the larger ones, and what would cause populations to increase or decrease. You can take a look at the students’ projects here.


5th Grade Cereal Box Book Report Videos

Fifth graders in Ms. Catlett’s class at Trevvett Elementary have been working on cereal box book reports (SOL5.2 & 5.3). If you want to learn more about the project and the rubric used to evaluate it click here. My job was to show them how to create a video for their project. We used WeVideo, and signed in with their Google accounts. The students clicked “Create a new video,” and we switched to Storyboard Mode (click the three lines in the top left corner). Then we clicked the “Title” slide in the bottom and edited it by clicking the pencil icon. I showed them how to do a Google image search for their book cover. We downloaded it from the Internet (right click on the image and click “Save image as…”), then we uploaded it to WeVideo (click the green cloud icon). Next the students clicked the red record button, installed the WeVideo extension, and recorded themselves describing their book and their cereal box. When they were finished, they added a text slide with “The End.” Finally, we clicked the Themes button and changed the theme of the movie. Each theme has its own accompanying music, so we had to turn that down using the volume slider in Timeline Mode (click the three lines in the top left corner again). To publish the videos, we clicked “Finish” and copied the link into Google classroom. You can see them all here.


5th Grade Figurative Language Animations

Fifth graders at Trevvett Elementary have been learning about different types of figurative language such as simile, metaphor, hyperbole, and personification (SOL5.4d). Today students in Ms. Capano’s class created animations to make figurative language sentences come to life! First we shared examples of figurative language that they had heard before. We brainstormed different ways you could illustrate the literal meaning of well-known phrases, like “faster than a speeding bullet” or “slow as a turtle.” I explained that today they needed to create their own sentence with figurative language. Then we would make an animated GIF that flashed back and forth between the literal and figurative meaning of their sentence. We went to ABCYa! Animate to create the animation. We used the text tool to type our sentence, and I showed them how to use the drawing tools to illustrate it. Next we clicked the copy cat button and changed the picture to show the literal meaning. When we were finished, we saved our animations using the export button and uploaded them to a Media Album in Schoology. You can take a look at their finished animations here.


5th Grade Probability Polls

Fifth graders at Laburnum Elementary have been learning about probability in math (SOL5.14). Today students in Mr. Hofilena’s class created probability slideshows with the new polling feature. First I posted a link to the Poll Everywhere extension on Google classroom so we could install this necessary extension before we got started (just click the Install button and follow the on-screen instructions). Then the students opened a copy of a blank Google slideshow and wrote their title and name on the first slide. I showed them how to change the theme, background color, and fonts. We also added some animation to the text. On the next slide, we used the shapes tool to draw different colored shapes (click the shape, then click and drag on the slide, and use the paint bucked to change its fill color). We discussed the probability of picking a certain color or shape. Now it was time to add the new polling feature. We clicked the Poll Everywhere button at the top of our slideshow (it appears once you add the extension), and chose “Insert > Poll.” We typed our question: “What is the probability of selecting ____?” Then we typed our answer choices: Certain, Likely, Unlikely, Impossible. To share the slideshow with our class, we clicked File > Publish to the web, and copied/pasted the link to Google classroom. When students viewed each others’ slideshows, they clicked the link on the polling page and answered the question. Finally, after everyone had voted, the students went back to their own slideshow and clicked Poll Everywhere > Insert > Screenshot to create a new slide with the results. You can see them all here.


5th Grade Animal Habitat Comics

Fifth graders at Varina Elementary have been reviewing animal habitats and ecosystems (SOL4.5), so today students in Ms. Rumans’ class created animal habitat comics. We used StoryboardThat to create the comics. First students selected a wild animal of their choice. I told them to pick an animal they were interested in and curious about. To broaden their horizons a bit, we discussed a variety of wild animals so they all didn’t pick cheetahs (which are insanely popular with elementary students for some reason). Once they picked their animals, they had to research their animals’ habitats and food webs. I showed them some quick guidelines for getting the information they needed by typing “name of animal” + “habitat” or “predators” or “prey” into a Google search. We used the basic layout on StoryboardThat with three panels, and each panel had to explain one of these facts. First we used the Scenes tab to get images of the animals’ habitats. Most of the habitats are included in the clip art. However, when it came to adding the animals, the clip art is somewhat limited. So students had to be creative and use animals that looked similar. I think the best example of creative problem-solving was using the hedgehog image for a beaver! I also showed them how to use the search box to look for additional items they needed, like nuts for a squirrel. They quickly found the blood splatter clip art which truly enhanced their predator/prey images. Finally we added the speech bubbles, and students wrote their facts in complete sentences. Some of them got creative with that too, writing it like it was a television documentary. I think you’ll enjoy looking at their final projects here.