Category: 5th Grade

5th Grade Southeast Region Facts & Opinions

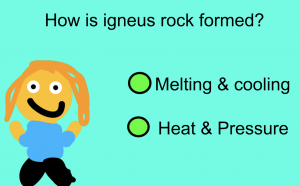
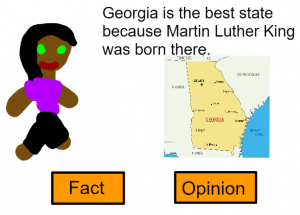
Fifth graders at Trevvett Elementary have been learning about the southeast region of the United States in Social Studies and facts and opinions in Reading (SOL5.6i). Today, students in Ms. Brown’s class created an interactive webpage with facts and opinions about a southeastern state. We used a fantastic new site called Wick that teaches coding in a simple but powerful way. First, the students chose a state in the southeast region to research. As they gathered information, I instructed them to download a map of their state to use in their project. Next, we went to Wick and clicked “Launch Editor.” We uploaded our map, used the drawing tools to create a character, and added two buttons for “Fact” and “Opinion.” To make a button in Wick, we selected the shape(s) and chose the “button” tool. We also grouped our character together (by dragging across all the parts) and turned it into a button. One of the most powerful features of Wick is the ability to give each button its own timeline that can be triggered with code. So we added new frames to our character’s timeline (by clicking it twice and clicking the + in the timeline) and added a stop(); code to each frame using the Javascript “JS” button. Without the stop code, the timeline would play and loop automatically, which is great for animation, but not for our activity. We typed an opinion about our state in one frame and a fact about our state in the other frame. Then went back to the main page and added code to each button to go to the correct frame. For example, our code on the “Opinion” button would go to the 2nd frame of the character’s timeline:

function mouseDown() {
character.gotoAndStop(2);
}

You can see that it is real JavaScript, but the students don’t have to type it all. They click the code snippets from the left panel, and it fills in automatically. Finally, the students checked their code by pressing the “Run” button. If everything worked, we exported it as an HTML file. You can see all their webpages here.


Tags:


4th Grade Decimals Calculator

Fourth graders at Trevvett have been learning about decimals up to thousandths. They have learned how to compare decimals and round them (SOL4.3). Today, students in Ms. Cockrum’s class created their own decimals calculators with Google sheets. First, I asked if they knew of a calculator that could add or subtract decimals. They all did. Then I asked if they knew of a calculator that could compare or round decimals. None of them did, so they were very surprised when I explained that they would create a calculator that could do that. I pointed out that they would be coders today, and I wanted them to go through the same process that coders go through when creating a new program or app. Coders often start out with a flowchart to make sure that each step of the code is in the correct order. We discussed the steps a calculator would need to go through to compare two decimals. It would have to decide if one of the numbers was equal to (=), greater than (>) or less than (<) the other. Then it would have to display the correct symbol. A decision on a flowchart is usually a diamond shape, and the answer is either "yes" or "no." So our first decision could be, "Is A greater than B?" If the answer is "yes," the code would display a ">” symbol. If the answer was “no,” the code would continue to the next decision. The next decision might be, “Is A less than B?” and so on. The decisions could be in any order, but the final step isn’t really a decision, it would be a command to display the only symbol that was left. The shape for output in a flowchart is usually a parallelogram, but I told them they could use whatever shape they wanted. We used Google draw to make the flowcharts, then we opened this template in Google sheets to create the code. I instructed the students to type any decimal they wanted in the decimals columns. Then we wrote code, or formulas, in the other columns. Rounding is the easiest, so we started with that. I showed them the code for rounding to the ones place, then I let them figure out the code for rounding to the other places. The code for rounding a number in cell E2 is: ones place =ROUND(E2,0); tenths place =ROUND(E2,1); hundredths place =ROUND(E2,2). Next, we used our flowcharts to write the code for comparing decimals. If decimals are in cells A2 and C2, the code to display the symbol would go between them in cell B2. It may look something like this (but it could be in a different order):

=IF(A2 > C2,”>”, IF(A2 < C2,"<","="))

The students were excited to see their calculators working, and if they didn’t work, the students had to think critically and problem-solve to figure out the reasons. That’s actually one of the most valuable lessons of learning how to code. Our final step was to share the links to our spreadsheets on Schoology. You can see some samples from Ms. Cockrum’s class and Ms. Messer’s class (5th grade) here.


5th Grade Henrico Election Posters

Fifth graders at Trevvett Elementary have been learning about Henrico county government (HC.2) in Social Studies, and they’ve been identifying the main idea and summarizing nonfiction text in Language Arts (SOL5.6d,e). Since elections are coming up in November, students in Ms. Harris’s class and Ms. Brown’s class conducted research to find information about the candidates running for office in Henrico County. Then we summarized our findings to create campaign posters. First, we used this site to see the list of candidates. Each student chose a candidate they weren’t familiar with since many of them already had a family favorite, and I wanted them to be exposed to different viewpoints. Next, they did a Google search for their candidate and explored their campaign website. I showed them where to look to find the “Beliefs” or “Issues” sections. After the students read some of their viewspoints, we discussed ways to summarize their views into a couple of sentences for the campaign poster. Students could use Google Docs, Google Slides, or Google Drawings (as well as other tools like DesignCap) to make posters, but we chose to use Google Drawings since we hadn’t used that tool yet. For the poster’s background, we added a square shape, made it as large as the poster, and changed the fill color so it was a solid color or gradient. Then we clicked “Insert > Word Art” and typed the candidate’s name. I showed them how to change the font, fill, and outline color of the text. We imported a photo of the candidate using the Google image search feature. Finally, we added a speech bubble with the Shapes button and typed a summary of the candidate’s beliefs. We shared our campaign posters on Schoology, but you can see them all here.


5th Grade Plate Tectonics

Fifth graders at Varina Elementary have been learning about changes in the Earth’s crust due to plate tectonics (SOL5.7e). Today, students in Ms. Gallahan’s class used their analysis skills to look for correlations between a map of the Earth’s plates and a map of current earthquakes and volcanoes. First, they made a copy of a Google drawing template showing a map of the Earth’s plates (you can get your own copy here). Next, I showed them how to add a fancy title using Word Art (Insert > Word Art). I demonstrated how to change the size, font, fill color, and outline. Then we went to this site to see where there are current volcanoes and earthquakes. The students were surprised to see so many going on all over the world! We took a screenshot of the map with the Snipping Tool (on Chromebooks you can also use the Windows Key + Ctrl + Shift to take a screenshot). We pasted the screenshot into our Google drawing, and I showed them how to make it half transparent using the Format Options menu (Adjustments > Transparency). The tricky part was resizing the screenshot so the continents were the same size and matched up on both maps. Once they were aligned, it was easy to see some correlations. The volcanoes and earthquakes were happening along the plate boundaries! The plates map has arrows showing their movements, so we could figure out which ones were convergent, divergent, and transform boundaries. I instructed the students to get a shape from the Shapes tool, change its color, and type one or two of their discoveries and conclusions in the shape. Finally, we shared our posters in Schoology. You can see some of them here.


5th Grade 3-D Models of the Earth

Fifth graders at Laburnum Elementary have been learning about the layers of the Earth in Science (SOL5.7d), so today students in Ms. Johnson’s class created 3-D models of the Earth using CoSpaces. First, I set up a free classroom account, and the students logged in with a code. Usually, the first thing you do in CoSpaces is click the Environment button at the bottom and chose an environment. We decided to use the default environment for this project to save time. Then, we clicked on Library button and chose the Build tab to find the half-sphere shape. We added that to our scene, and I showed them how to use the pop-up tools to raise the shape and rotate it. Right-clicking on the shape brings up a menu that we used to change the color of the shape. Since this represented the crust, we also added a label using the right-click menu. Then, we duplicated the shape, shrunk it a bit, recolored it, and labeled this new half-sphere as the mantle. Some chose to try to push the shape into the crust, while others left theirs out. The students continued in this way, adding the rest of the layers of the Earth. Finally, we chose a character from the characters library to add to the scene. The characters can be customized and given speech bubbles by right-clicking on them. CoSpaces has a coding component as well, but we didn’t have time to code during this lesson. We shared our projects in Schoology, and you can see some student examples here.


5th Grade Hurricane Hypothesis

Fifth graders at Varina Elementary have been learning about the scientific method: forming a hypothesis, collecting data, taking measurements, graphing information, and analyzing the results (SOL5.1). Since Virginia is currently facing the threat of Hurricane Florence, and since the 5th graders need to review weather (SOL4.6), we decided to research hurricanes using the scientific method. First, I showed them some photos of past hurricanes and identified the eye of the hurricane. If the “eye” is the center, then the “eyelid” can be the area near the eye, and the “eyebrow” can be a bit further out. What part of the hurricane has the strongest winds? We made a copy of this spreadsheet, and I asked the students to write their hypothesis in the purple box. For example: If the distance from the eye increases, the windspeed will increase (or decrease). Now it was time to make some measurements and collect data. We went to Windy and Earth which show live storms on the Earth. You can click anywhere in the storm to get the windspeed (you may need to go to settings to change the units to mph). We used Accuweather or the National Hurricane Center to get the names of the hurricanes. The students could measure the winds in any hurricane they wanted, and I pointed out that the more data they collect, the more reliable their conclusions will be. They recorded the information in their spreadsheet, including the name of the hurricane and the windspeed measured at the eye, eyelid, eyebrow, and maximum (found by just searching around the storm for the biggest number). Finally, I showed them how to graph the data and customize the colors. We analyzed the results to confirm or revise our hypothesis. Most of us discovered that the strongest winds were in the eyebrow area, so as the distance from the eye increased, the windspeed increased. You can take a look at some student samples here. UPDATE: Schools closed the next day, 9/14, due to Hurricane Florence, and on 9/17 we had tornados!


5th Grade Classifying Our Classmates

Fifth graders at Holladay Elementary have been learning about classifying objects (SOL5.1a) and organisms (SOL5.5b) using various characteristics. Today, students in Ms. Haislip’s class practiced this skill by classifying their classmates. First, we went to AvatarMaker and created an avatar that looked like us–same hair style, eye color, etc. We downloaded the image as a 200×200 png file (click “Download”). Then we uploaded it to a shared Google slideshow so everyone could see each other’s avatars. Once all the avatars were uploaded, I turned off file sharing so no one would accidentally move or delete the images. I arranged the avatars neatly on the slide then instructed the students to make a copy of the slideshow (File > Make a copy). On their own copies, they duplicated the class slide (Right click > Duplicate slide), and we discussed ways to classify the students into groups with common characteristics. The students had many great ideas: gender, hair color, eye color, glasses, facial expression, etc. They chose a characteristic and typed it in the top of the slide. Next, they clicked and dragged the images to sort them into groups. As an option for making the groups clearer, I demonstrated how to create shapes with the Shapes tool and send them to the back (Arrange > Order > Send to Back). If students finished, they could make additional copies of the slide and create different sorts. You can see some student examples here.


5th Grade Green Screen Graffiti Introductions

Today was the first day of school at Trevvett Elementary, and the 5th grade classes wanted to start right off with a green screen project! The teachers were looking for a new, creative way for their students to introduce themselves. They thought a graffiti wall with each student’s name and photo would be cool. So we used PosterGen Grafitti Creator to make the wall and added their photos with a green screen app on the iPads called DoInk. First, the students designed their graffiti wall on PosterGen. This free resource allows you to edit all the parts of the graffiti–the font, the outline, the fill color, the glow, and more! Once the students had created their graffiti name on the virtual brick wall, we took a screenshot and saved it to Google Drive. Then we opened the DoInk app on our iPad, stood in front of a green screen, and uploaded the image to replace the background. Our green screen was simply a sheet of green bulletin board paper. Since some students were wearing green (which wouldn’t work on a green screen), we also had a sheet of orange paper as an alternative. The DoInk app can replace any color background, not just green. When we took the photo in DoInk, it looked like they were standing in front of their graffiti wall. You can see a few students samples here.


5th Grade Memory Walls

Fifth graders in Ms. Haislip’s class had a great year this year and wanted to remember it by creating a memory wall. There are numerous web tools you could use for a project like this, but today we used DesignCap. It’s a free resource that doesn’t require a sign-in, so it’s quick and easy to use, plus, it has many great features that I’ll describe below. In preparation for this project, Ms. Haislip uploaded photos from the school year to a Google folder and shared the link with her students on Schoology. Each student downloaded the pictures they wanted to use, then uploaded them to DesignCap using the Photo > Add Photo link. Next, they dragged the photos to the poster, rotating and resizing them until they were arranged the way they wanted. We used the Background tool to design a colorful background with gradients, and I showed them how to use the Text tool to add a title and captions to each photo. The text tool on DesignCap is quite robust, providing options for font, fill color, outline color, glow color, and transparency! The students practiced typing complete sentences with correct capitalization and punctuation for their photo captions (which is still a challenge, even for fifth graders). When we were finished, we clicked the Save button and selected the medium size. DesignCap projects can be saved in a variety of sizes up to the very generous XLarge size of 2478 x 3506 pixels. Finally, we uploaded our files to Schoology so we could enjoy viewing each others’ memory walls. You can take a look at them all here.


5th Grade Student-Created Review Activities

Fifth graders at Varina Elementary have been reviewing science SOLs for the year. Today, students in Ms. Messer’s and Mr. Williams’ classes used Wick to create interactive review questions. First, we brainstormed a list of topics they have studied this year: weather, rocks, cells, oceans, planets, sound, light, force, and elements. Next, students chose a topic and developed a good, thoughtful question with plausible answer choices. We went to Wick, added a background color, and typed our question and answers with the text tool. I showed them how to change the font, size, and color of the text using the toolbar on the right. We used the shapes tool to draw circles next to each answer choice and turned them into clickable buttons with the “Create Button” tool (pointing finger icon). Then, we used the paint tools to draw a character who would respond to the correct or incorrect answer. In order to create the code, the character had to be a named group, so we highlighted all its parts and clicked the “Group Objects” button. Beside “Name” in the Group tool bar, we gave it a name (like “boy” or “girl”). Then we double clicked the character and clicked the “Clone Frame” button to make two copies of it. Frame 2 represented the correct answer, so we gave our character a smile. Frame 3 represented the incorrect answer, so we gave our character a frown. Now we could add code to the buttons. Wick makes coding easy by including code snippets in the library. For the correct button, we used this code (changing the name boy to whatever the group was called):

function mousePressed() {
boy.gotoAndStop(2)
}

For the incorrect button, we used the same code, but just changed the code to gotoAndStop(3) so it went to Frame 3 of the character. We clicked “Run” to test our activity. If everything worked, we exported it as an HTML file and shared it on Schoology for our classmates to try. You can see all their questions here.


Tags: