Search Results for "coding"

5th Grade Coding Figurative Language

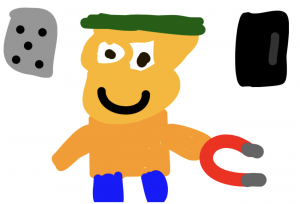
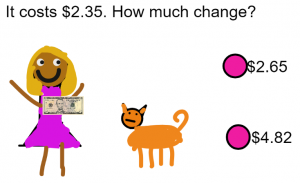
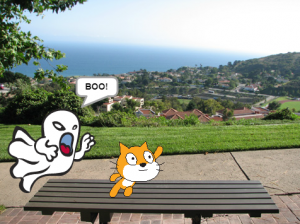
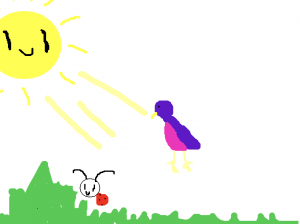
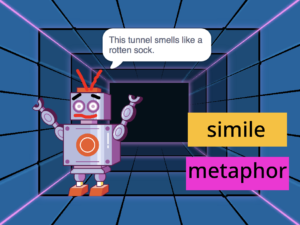
Fifth graders at Trevvett Elementary have been learning about figurative language (SOL5.4d) in English, so today students in Mr. Golden’s class used Scratch and coding to create interactive posters with figurative language. First, we reviewed different examples of figurative language: simile, metaphor, personification, hyperbole, and alliteration. Then we logged into Scratch, and the students chose a background and a character (sprite). They also created two buttons and wrote a type of figurative language on each. In the code for each button, they used the “Broadcast Message” block so that when the button is clicked, it would send a message to the character. Next, they created three costumes for their character. One costume would give the directions and the other costumes would give examples of figurative language that related to the character, background, and situation. Finally, the students added code to the character so that when it received a message from a buttons, it would say the correct thing. So if the user clicked “Metaphor,” it would give an example of a metaphor. You can try out some student examples here.


Tags:


2nd Grade Coding Magnets

Second graders at Holladay Elementary have been learning about magnets and magnetism (SOL2.2), so today, students in Ms. Edmonds’ class used Wick to code a magnets activity. First, I showed them a finished sample so they could see what they would be creating. Basically, they will have a person, a magnet, and two objects–one that’s magnetic and one that’s nonmagnetic. Then, they will use code to make the person smile when the user clicks on the magnetic object and frown when the user clicks on the nonmagnetic object. We reviewed different objects that were magnetic and nonmagnetic, then we got started. The students used the drawing tools to draw a person, a magnet, and two objects. I showed them how to change the objects into buttons (click the finger icon) and we added some code to the buttons. I like how Wick uses real code, but they keep it simple by including a code library that students can choose from. So instead of typing the code, they just click it. Our code for the buttons read: mousePressed gotoAndStop(2) for the magnetic object and mousePressed gotoAndStop(3) for the nonmagnetic object. Next, we duplicated Frame 1 (right click on it) and changed the face in Frame 2 to be smiling. We did the same thing for Frame 3, but changed the face to be frowning. Finally, we tested our code to be sure it worked and clicked File>Export HTML. That’s it! They just created their own interactive magnets website, which is really impressive for 2nd graders! You can see all of their activities here.


Tags:


3rd Grade Coding Money and Change

Third graders at Laburnum Elementary have been learning about money and counting change up to five dollars (SOL3.8). Today students in Ms. Hunt’s class used a new coding program called Wick to create an interactive math problem about making change. First, I showed them a couple of examples so they could get an idea of what we were going to do (here and here). I pointed out that their projects could look very different, but they had to have three things: (1) an object to buy with a price under $5; (2) a person with a $5 bill; (3) a right and a wrong answer. To get the students started, I created a template with some money files that you can download here. The students downloaded my template from Schoology, started a new project in Wick, and uploaded the template (File > Open). Now, in the Assets Library on the right, they had some money images to use if they wanted. They illustrated their problem with the drawing tools and typed out the question and answers with the text tool. We created two more frames by copying the first one (right click > Clone frame) and made a few changes to show the correct answer (the person gets the object and is happy) and the incorrect answer (the object leaves and the person is sad). Finally, we added the code to the buttons so that they go to the correct frame. One of the things I really like about Wick is that is uses real code. So we added a stop() code to each frame and programmed the buttons to go to the correct frames gotoAndStop(2) or (3). Wick exports projects as HTML files so they play in any browser. You can see all their projects here.


Tags:


5th Grade Coding Character Traits

Fifth graders at Trevvett Elementary have been learning about character traits and making inferences (SOL 5.5b,i). Today students in Ms. Brown’s class created 3-D scenes where the viewer has to make inferences about the character traits based on what the character does and says. First, we discussed how to show (but not tell) character traits in a story. How can we show that a character is compassionate? short-tempered? clumsy? brave? deceitful? I explained that they would use code to animate a 3-D model, revealing one character trait. We brainstormed a list of traits, and they chose one they wanted to show. Next, we signed into CoSpaces with our Google accounts and created a new scene. I showed them how to click the Environment button at the bottom and select one of the built-in backgrounds. Then we clicked on the Library button and added people and objects to the scene. I demonstrated how to use the buttons that appear above each object to resize, raise/lower, and rotate it. Right clicking on an object reveals a menu for customizing its color and activating it for use in the Blockly code. Finally, we clicked the Code button at the top and added bits of code to make it move and speak and interact with other objects. We published our projects with the Share button and pasted the links to Schoology with a question about the character traits for our classmates to answer. You can see all their projects and questions here.


Tags:


5th Grade Coding Causes & Effects

Fifth graders at Holladay Elementary have been learning about cause-effect relationships (SOL5.5j). Today students in Ms. Neal’s class illustrated cause-effect relationships with animations created in Scratch. First, we brainstormed ideas of different situations that clearly show causality: accidents, sicknesses, successes, failures, surprises, etc. Next, the students logged into their Scratch accounts and created a new activity. I showed them how to add additional sprites and change their costumes. We wanted the costumes to reflect the cause-effect relationships. For example, if the milk spoiled, one costume would show good fresh milk, and the other costume would show green rotten milk. The person drinking it could have two costumes as well, one with a happy face and one with a disgusted face. In order to build the animation, we used the codes for Motion, Looks, and Control. Each sprite had its own code telling it when and how to move. The code also programmed the sprites to “say” things and change their costumes at specific times. One of the great features of Scratch, is that every project has a “Look Inside” button that you can click to see the code. Take a look at all of their projects here.


Tags:


3rd Grade Coding a Food Chain

Third graders at Holladay Elementary have been learning about food chains (SOL3.5), so today students in Ms. Whittaker’s class created an animated food chain using code in Scratch. First, we reviewed the different types of aquatic and terrestrial food chains, and we discussed how all food chains start with the sun. Next, I helped the students set up their Scratch accounts. We started a new project, deleted the cat sprite (the default character), and I showed them how to draw their own sprites. They drew a sun, a plant, an animal to eat the plant (an herbivore), and an animal to eat that animal (a carnivore). Since it was going to be animated, they also drew several costumes for each sprite. For example, their sun sprite had costumes showing the rays shining down on the plant, and their plant sprite had costumes showing how it was being eaten. Finally the students added code to each sprite. The sun code looped through the costumes so it repeatedly sent rays to the plant. The other sprites’ codes programed them to move and cycle through the costumes at different time intervals, making it look like they were eating and getting eaten. We shared our project links on Schoology, but you can see them all here.


Tags:


5th Grade Coding an Ocean Tour

Fifth graders at Trevvett Elementary have been learning about the ocean (SOL5.6), so today students in Ms. Adamonis’ class used code to create an ocean tour in Scratch. First, we discussed different topics they could include in their tour: parts of the ocean floor, different depth zones, and various ecosystems. Next, we went to Scratch, and I showed them how to change the background by either drawing it or uploading a picture. Then they needed to add a tour guide (called a “sprite” in Scratch). Most of the students chose one from the built-in library, but they could also draw their own. Finally, I explained how to use code to create the tour. The drag and drop pieces of code could be used to animate the tour guide and make it “speak.” They quickly discovered the sound effects code and had fun adding audio to their projects. Some of the students went way beyond the original scope of the assignment and added keyboard strokes so that it could be played by an external controller (like a Makey Makey). They shared their finished projects on Schoology, but you can see them all here.


Tags:


3rd Grade Coding with Cycles

Third graders at Trevvett Elementary have been learning about cycles (SOL3.8): the lunar cycle and plant and animal life cycles. Today students in Ms. Smith’s class used basic coding skills to create animated diagrams of a cycle of their choosing. First we went to the Scratch website and created an account. Scratch is a programing language developed by MIT to teach children about coding. We started a new project and clicked the Stage button. Then we clicked the paint brush icon to create a new stage. The students used the paint tools to draw a diagram of one of the cycles. Next we right clicked on the default sprite (the Scratch character) and deleted it. I showed the students how to choose a new sprite from the sprite library. Now it was time to write some code. The students positioned their sprite where they wanted it to start. They chose “When the flag is clicked” Event to begin their code and added a “go to x-y” element from the Motion library. Then they added a “say _ for _ secs” element from the Looks library and typed the first step in the cycle. For each subsequent step, they moved their sprite to another part of the cycle, added a “glide 1 secs to x-y” Motion element and a “say _ for _ secs” Looks element until all the parts were identified. Testing the code is the most important part and provides an excellent opportunity for logical thinking and problem solving when the animation doesn’t work out as planned. When the students’ projects finally worked, they pressed the “Share” button and pasted the links to Schoology. You can see all their projects here (be sure to press the “See inside” button to take a look at their coding).


Tags:


4th Grade Coding Shapes

CaptureFourth graders at Davis Elementary have been learning about polygons (SOL4.12) and angles (SOL4.10), so today students in Ms. Bennett’s class used their knowledge of angles to create polygons using basic coding skills. Teaching students about coding is an important skill that is being emphasized more and more. Not only is it practical, but it also trains the brain in logical and sequential processing. I posted a link to Scratch on Google classroom, which is an excellent site for teaching elementary students how to write basic computer code. I helped them set up their accounts, and we used the teacher’s email for confirmation. Then we signed in and clicked “Create” to start our project. I did an example first, showing them how to use code to create a triangle. We discussed pixels (for the length of the sides), angles (for the corners of the shape), and position (for returning to the beginning). First I wrote a long code, programming each side and angle, then I asked if they thought there was a simpler way. Some of them figured out that they could use the loop feature to handle some of the repeated commands. Now they were ready to create their own shapes. We started by making a custom sprite (click “New Sprite” and choose file, drawing, or camera). The the students used the coding blocks to make their shape. They could create any polygon with less than 10 sides. They also added a speech bubble at the end for their sprite to say the name of the shape they created. When they were finished, they shared their projects on Google classroom. You can see them all here. Be sure to click the “See Inside” button to take a look at the code.


Tags:


3rd Grade Coding Angles

Screen Shot 2015-08-12 at 7.53.57 AMThird graders at Davis Elementary have been learning about different types of angles – acute, obtuse, and right (SOL3.15), so today students in Ms. Cousins’ class at Davis used computer code to create different angles. First we logged into Google classroom where I posted a link to Code.org. This website provides tutorials for elementary students to learn how to write simplified computer programming code. Students log in with their Google accounts and they can either create an app or a drawing. To make the angles, we chose the drawing option, but at the end of the lesson I gave them the opportunity to explore that apps part as well, which they loved because it is similar to coding games. First I showed them how to draw a straight line with code. Then we figured out the angle “drawing man” would have to turn to make a right angle (90ยบ), and we added that part to our code. Next I asked if they could figure out how to draw an acute angle in another spot with a different color. Finally I challenged them to draw an obtuse angle. The students posted the links to their finished angles on Google classroom so they could see each others’ projects. That’s all we had time to do today, but once your students become familiar with the coding process, they can write all sorts of elaborate programs. Check out some of their work here.


Tags: