2nd Grade Magnets Animation
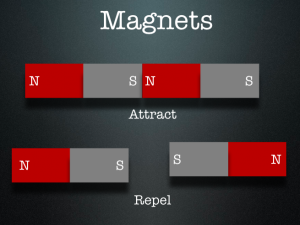
 Second graders at Laburnum Elementary have been learning about magnets (SOL2.2) and today they created Keynotes to explain how magnets work. Keynote is a great program to use for magnets because of its animation features. Students can actually show magnets being attracted to or repelled from each other. First we created the magnets. I showed them how to make two rectangles (red for north, grey for south) using the Shapes tool. We labeled them N and S using Text Boxes. We grouped them all together to make one magnet. Then we copied and pasted the magnet three times to make a total of four magnets. We arranged the magnets so that pairs were opposite each other like in the picture. The last magnet we had to ungroup so we could switch the poles, then we grouped it back together. We added the words “Attract” and “Repel” under the pairs of magnets. Next I showed them how to add the animations. I let them use whatever animations they wanted for the words and the transition, but we had to use specific ones for the magnets. We used the “Move In” animation to make the magnets appear and come together. To show the magnets repelling, we used the “Move Out” animation. Finally I showed them how to record their voice in sync with the animations. They did an excellent job! You can see a few student samples here: Kezah, JaNiya, and Takiyah.
