Tag: video

2nd Grade Animal Habitat Animations

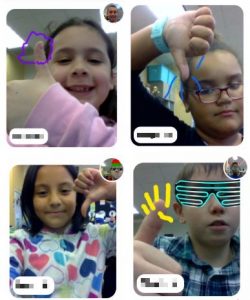
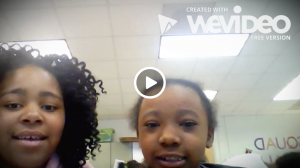
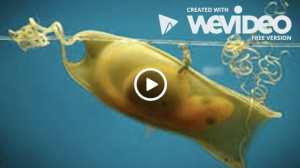
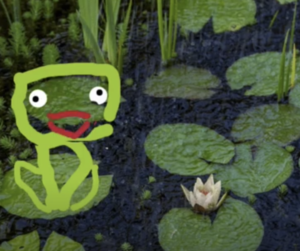
Second graders at Holladay Elementary are learning about animal habitats in Science (SOL2.5), so today students in Mr. Reams’ and Mr. Gunter’s classes created animal animated GIFs with sound. Usually GIFs don’t have audio, but we attempted a workaround. First, we reviewed different habitats (woodlands, rainforest, grasslands, desert, arctic, ocean, freshwater, etc) and the animals that live in each. Then, we went to BrushNinja and added a background image of the habitat. Some students chose to draw their own background while others used the built-in photo search. Next, they used the drawing tools to draw an animal that lives in that habitat. I showed them how to duplicate the frame at the bottom and make slight changes in their animal drawings to make it appear like it’s moving. I pointed out that their animal will be speaking so they need to animate the mouth. We discussed different ways to draw the mouth in each frame so it looked like it was talking: an 0 shape, a straight line –, with teeth showing, with the tongue sticking out, etc. When they finished their animations, they exported them as animated GIFs and uploaded them to a Schoology discussion. To add the audio, I showed them how to reply to their own post in Schoology and click the microphone button to record. I later combined the audio with the animations in WeVideo. You can see their finished projects here: Mr. Gunter & Mr. Reams.


5th Grade Anti-Bullying Video

A group of fifth grade girls at Varina Elementary asked me to help them make an anti-bullying video for their school. They had written their own song and even choreographed some dance moves to go along with it! They just needed some tools for creating the beats and recording the video. I showed them ButtonBass for making the beats. You can click different cubes at the top of the webpage for different genres. Then click different squares on the cube to add in beats, synthesizers, and even vocal samples. It’s easy to use and no login is required. Other great websites for making music and beats are: Incredibox, Chrome Music Lab, TypeDrummer, and SuperLooper. Next, for recording the video we used Pixect because it has special effects you can add to your video. If you don’t need special effects, another easy-to-use site that let you record video from a webcam is Webcamera.io. Their video turned out great, as you can see here. UPDATE: I included their project, along with another group’s project in my workshop on Creativity.


Tags:


5th Grade Vertebrates and Invertebrates Videos

Fifth graders at Holladay Elementary have been studying vertebrates and invertebrates in Science (SOL5.5), and they have been learning how to conduct research (SOL5.9), so today, students in Ms. Haislip’s class chose an animal to research and made movies about their animal using Adobe Spark. First, we brainstormed many different types of vertebrates and invertebrates, including insects and ocean creatures. Then I encouraged students go beyond the first few animals they recalled. I demonstrated how to use the internet to find unique animals that they had never heard of before. They could ask Google, “What are the most interesting animals?” or “What are the most poisonous animals?” or “What animals have superpowers?” After about five minutes of research, the students chose their animals and jotted down a few facts. They also downloaded one or two photos of their animal. Next, we went to Adobe Spark to start creating our videos. The students made a title screen and then recorded themselves introducing their animal. I explained that they need to speak with enthusiasm, like their favorite YouTuber. Then they added the photos and recorded a voiceover to give facts about their animal. Finally we added music, adjusted the volume so it wasn’t too loud, and published our videos. Students shared their videos with each other on Schoology, and you can see some of them here. (As you can see, they discovered some very unique creatures!)


Tags:


5th Grade Plant Cell Videos

Fifth graders at Varina Elementary have been learning about plant and animal cells in Science (SOL5.5), so today, students in Ms. Gallahan’s class created cell videos with Adobe Spark. Adobe Spark is a great tool for creating short videos that look and sound amazing. First, we reviewed the different parts of the cells and their functions. I challenged the students to practice what they have learned about figurative language (SOL5.4d) and compare the cell parts to something else that serves a similar purpose. Now that we had some ideas, it was time to get started on our videos. We signed into Adobe Spark with our Google accounts and created a new video project from scratch. On the title page, students typed a creative title and added a background image using the built-in photo search (click “Find free photos”). One of the things I really like about Adobe Spark is their fantastic library of high-quality stock images that students can use in projects. We continued using those images in our subsequent video frames where students also added sentences comparing the cell parts to other objects. Then we recorded voice-over narrations for our videos. Recording a voice-over is a simple as pressing the big red microphone button. Finally, utilizing another cool feature in Adobe Spark, we added a soundtrack from the built-in music library. We published our videos and shared the links with our classmates on Schoology. You can see them all here.


Tags:


4th Grade Flipgrid Debate

Fourth graders at Trevvett Elementary have been studying life in colonial Virginia (VS.4), and they have been learning how to conduct research (SOL4.9) and express an opinion supported by facts (SOL4.7j). Today we reviewed and practiced these concepts with a Flipgrid Debate. Knowing how to have a civil debate is an important citizenship skill which can be taught, even in elementary school. This article in Edutopia explains how oracy, or speaking well, can serve our students for the rest of their lives. Oral communication is the first of the English SOLs for every grade (K.1, 1.1, 2.1, etc.), but we are often at a loss for how to teach it. Voice21 provides great resources and rubrics for teaching oral communication to elementary students. I will be presenting on this topic at VSTE2018 if you’d like to learn more about it. My presentation is here. One fun, unstressful way for students to practice public speaking is to record videos, which is why we are using Flipgrid. Most of them have their favorite YouTubers, so they have some background knowledge about good public speakers. We discussed how those YouTubers speak with enthusiasm and expression and share interesting information. Then I gave the students a debate topic: “Life in Colonial Virginia was better than life in modern Virginia.” I explained that they would choose a side, pro or con, and defend their position with facts. We spent a few minutes researching facts about colonial Virginia on the Internet. Students copied the URL for the website they found most useful. Then, when we recorded our videos in Flipgrid, they clicked the button for attaching links, and pasted in the URL as a citation. Some of the sites the students found were: 1, 2, 3, 4, and 5. Flipgrid videos use snapshots for the video thumbnails, so I instructed students to show their pro or con position visually in the snapshot with an emoji or thumbs up or down. Next, they had to find someone who held an opposing position, listen to their argument, then record a counterargument as a reply. We reviewed ways to disagree politely and with a respectful attitude. Even though this was their first debate, they did a great job! You can take a look at their videos here.


Tags:


1st Grade Fall Videos

First graders at Holladay Elementary have been learning about the fall and how it affects animals, people, and the weather (SOL1.7). Today, students in Ms. Sokolowski’s class used WeVideo to create their own fall videos. First, they chose a partner to work with, and one of the partners signed into WeVideo using their Google account. I showed them how to press the red record button and set up their webcams following the on-screen prompts. Next, we brainstormed ideas to talk about, making sure they understood that the topic was fall (sometimes first graders like to go off topic :). We also discussed the importance of looking at the camera and speaking loudly and clearly. Ms. Sokolowski and I recorded a sample video to model the process for the students.
Finally, the students were ready to record their own videos. We walked around, providing guidance as needed and trying to stay out of their movies. When they were finished, I showed them how to save their videos. We downloaded them and saved them to our Google drive (if you have the free version of WeVideo, the videos will eventually be removed over time, so be sure to download them if you want to keep them). You can see some of the students’ videos here.


Tags:


Varina Library Rap

Varina Elemenatry started a reading incentive program to encourage students to read 40 books or more. Today we recorded a rap video that will be shown to the whole school, explaining the program. Mr. Jones, the PE teacher, and Ms. Jackson, the art teacher demonstrated their rapping skills with raps they wrote themselves! Students also choreographed their own dance routine to accompany the video. My job was to add the green screen effects. Since we didn’t have a green screen, I just hung up some green bulletin board paper. I also hung up some orange bulletin board paper for students who were wearing green (you can use any color, as long as the performers aren’t wearing that color). Then I recorded them using the DoInk Green Screen app on an iPad. Within the app, you can choose the color you want to be transparent and add a background to replace it. I used some generic music video backgrounds that I downloaded. The last step was to add the song files. We shared the finished video on Google drive so all the students could see it. You can watch it here.


Tags:


4th Grade Social Studies Videos

Fourth graders at Laburnum Elementary have been reviewing the regions of Virginia (VS.2b) and famous people from the Civil War era (VS.7c), so today Ms. Mayer’s class created Social Studies videos on these topics to help them review. First, they chose a partner to work with and decided together on a Virginia region or a Civil War person to research. Next, we spent a few minutes looking over our notes and finding information online to share. I showed them how to download and save online images about their topic to use in their video. Then we logged into WeVideo to begin making our movies. WeVideo starts out in Timeline mode, which is a little complicated, so we switched to the simplified Storyboard Mode (click the three lines in the top left). Storyboard Mode already has a Title page set up in the timeline. We clicked the Edit icon on the Title page and typed our title, remembering to use capital letters. Now it was time to record our intro. I guided them through the process of installing the webcam extension and modeled how to record an effective intro (speak loudly with enthusiasm while stating your names and your topic). After the students had recorded themselves, we uploaded the pictures we had saved and dragged them into the movie timeline. The students planned what they would say about each image, but before they recorded their voiceover, they chose their Theme by clicking the magic wand icon. I found that it is helpful to choose the theme before recording the voiceover because the theme sometimes changes the duration of the video. Just be sure to mute the audio while recording the voiceover so it’s not playing while you are recording. The students recorded their voiceovers, providing facts about each picture. Finally we published our videos and shared the links on Schoology. You can see them all here.


3rd Grade Life Cycle Movies

Third graders at Holladay Elementary have been studying animal life cycles (SOL3.8b), so today students in Ms. Haley’s class researched an animal life cycle of their choice and created a video about it. I asked them to pick an animal they were curious about. To help spark their curiosity, I asked questions like: Do sharks lay eggs? What does a baby firefly look like? Do jellyfish go through metamorphosis? Once they had their ideas I gave them a few minutes to research online. We discussed reliable and unreliable websites: encyclopedias, museums, and science websites would be reliable, whereas a personal website or blog would be less reliable. I also explained how to tell the difference between real photos and fake photos. A real photo will have several examples that look similar. For example we did a search for “jellyfish eggs” (they don’t lay eggs) and found an image of a fried egg jellyfish (which isn’t quite what we were looking for, but it’s an actual thing). A better search phrase would be “life cycle of a jellyfish” (we discovered that its life cycle is quite complicated). After the students gathered their facts and photos, we logged into WeVideo with their Google accounts. We switched to Storyboard mode, which is simpler, by clicking the three lines at the top left. I demonstrated how to import their photos with the green cloud icon, and we changed the title of our video. Next, the students recorded an introduction using the webcam feature. We dragged our photos from the media folder down into the timeline and recorded a voiceover. Finally we selected a theme with music, turned down the volume of the music so it didn’t drown out our voiceovers, and published our videos. You can see them all here.


Tags:


3rd Grade Measurement Movies

Third graders at Laburnum have been learning about liquid measurement in Math (SOL3.9b), so today students in Ms. Hunt’s and Ms. Gradeles’ classes created measurement movies with WeVideo. Students could choose whether to work alone or with a partner. We reviewed the units of liquid measurement they have been learning about: cup, pint, quart, gallon, and liter. They chose one unit and used books, notes, and the Internet to find examples of liquids that would be measured by their unit. I showed them how to download images from a Google image search by right clicking on them and choosing “Save image as…” Then we went to WeVideo and signed in with our Google accounts. WeVideo starts out in Timeline mode, which is a little complicated, so we switched to Storyboard Mode (click on the 3 lines in the top left corner). This reveals a Title screen at the bottom. I instructed the students to click the pencil icon on the Title screen to change the title to their unit of measurement. Then students pressed the red record button, and (after installing the necessary webcam extension) recorded themselves introducing their topic. I showed them how to upload the images they had saved earlier by clicking the green cloud icon. Students added the images to their video by clicking and dragging them down in the order they wanted them to appear. Finally the students selected a Theme with music by clicking the magic wand button. We found that we needed to switch back to Timeline mode to lower the volume of the music so we could hear our voices. Once our movies were complete, we clicked the Finish button and copied the link into Schoology. Now students can watch each other’s videos for a fun review of the units of liquid measurement! You can see them all here.


Tags: