Tag: keynote

2nd Grade Subtraction Animations
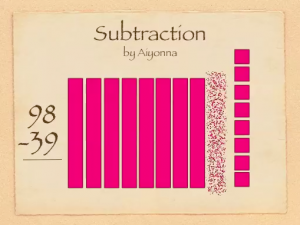
SubSecond graders in Ms. Gardner’s class at Holladay Elementary have been learning the difficult concept of subtracting with regrouping (SOL2.7). Sometimes abstract ideas become clearer when we can visualize them with an animation. It’s even better if we have someone verbally explaining the animation. The best way is to create and explain the animation yourself! So that’s what we did today using Keynote. First we opened up a blank Keynote and I showed them how to add a Title and change the theme. Next, I instructed the students to come up with two numbers less than 99 that would require regrouping to subtract. They added those numbers to their slide with text boxes. Then they used the shapes tool to represent the top number as base-10 blocks (bars for tens and cubes for ones). Now it was time to add the animations. This is where Ms. Gardner and I really got to see which students understood the concept and which ones didn’t. The used the Inspector to add “Build Out” or “Build In” animations to the different bars and cubes. They had to make one ten disappear and ten ones reappear. Next they had to make the correct number of ones and tens disappear to show the subtraction problem. At the end they should have had the same number of base-10 blocks as their answer. They used a text box to make their answer appear, and finally they recorded the voiceovers explaining each step. The students exported their slideshows as a QuickTime video. It was a lot of work for these second graders and took us a couple of days, but they hopefully they have a better understanding of subtraction with regrouping. You can see a couple of student examples here: Giada and Jessie.

3rd Grade Finds the Best Bait for Three Lakes Park

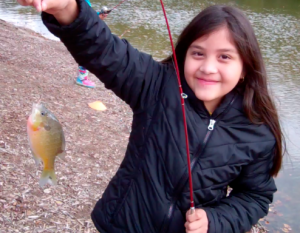
fishingEach year the 3rd grade students at Holladay Elementary take a PE field trip to Three Lakes Park to go fishing. This year they decided to do a science experiment to see which type of bait worked best. In groups, they researched which kinds of fish are at the park and what types of bait to use. The students developed their own hypotheses about which type of bait would work best, and then they tested their hypotheses at the park by keeping track of which types of bait caught which kinds of fish. They also measured the fish as they caught them and took photos. They had practiced measuring fish earlier in Art class using fish rubbings. The photos were posted online here using CoMemories. (CoMemories is a great site for sharing pictures because anyone can contribute with the given link). Back at school, students analyzed the data and drew conclusions. They concluded that worms were, by far, the best bait. I helped them publish their findings in a brochure for the visitors center at Three Lakes Park. They also created group presentations about the different types of fish using a program of their choice (Comic Life, Keynote, Pixie, and/or video). You can take a look at the students’ presentations here. Finally, they scored their projects using a rubric. This project was also Holladay’s entry for Henrico21. Hopefully we’ve helped future 3rd graders and other visitors to Three Lakes Park catch lots of fish!


3rd Grade Library Project

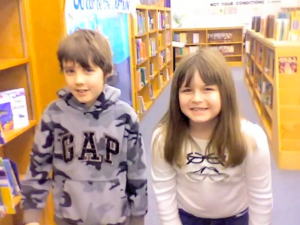
libraryToday I worked with small groups of third graders at Holladay Elementary to create videos for a contest. The theme was “The Library is the Heart of the School.” The students had to extend that analogy and think of creative ways to express it. I was really impressed with the ideas they came up with. Like Jacob thought of this excellent analogy: “The library pumps in people and the hallways are like the veins. Then it pumps out people with books. The people with the books are like the clean blood and the people with no books are like the dirty blood.” Some of the students gave a walking tour of the four parts of the library, comparing it to the four chambers of the heart. Others pointed out that the heart is often considered the place of emotions, and the books in the library make you feel all kinds of emotions like happiness, sadness, and fear. The students used Photo Booth to film themselves and iMovie to edit the videos. Some of them also added Keynote slides. Their projects turned out great! Take a look at them here: Group 1 and Group 2.


1st Grade Addition Animations

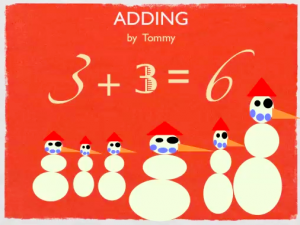
Screen shot 2014-03-21 at 12.49.11 PMFirst graders in Ms. Long’s class have been learning how to create and solve one step story and picture problems using basic addition facts (SOL1.6) so today we made animated Keynotes to illustrate an addition problem they created. First we opened a blank Keynote (there’s no template to download) and the students added a title “Addition” and their name. Then I showed them how to create a simple snowman using the Shapes tool. We grouped it together and made copies of it. Next the students added a text box to show the number of snowmen they started out with. We used the Build In animation feature to make the number appear. Then we pasted in more snowmen and added another text box for that number. The students added their numbers together and typed the answer. Finally I showed them how to record their voices as they told their story problem. We exported the Keynotes as videos, and you can take a look at a few student samples here: Eric, Madeline, Natalie, and Tommy.


Tags:


Kindergarten Measurement

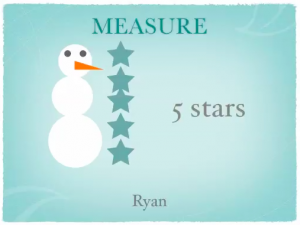
Screen shot 2014-03-17 at 7.34.08 PMKindergarten students in Ms. Dunkum’s class at Davis Elementary have been learning how to measure and compare objects using nonstandard units (K.10) so today we practiced those skills using digital tools. I tried this lesson with another class previously where they found a picture of an object online and measured it using shapes in Keynote, however, it took too long to get the picture, and we didn’t have time to write the unit of measurement. So many students ended up saying “inches” or “feet” even though we weren’t using those units. You can see a couple of those student examples here: Belladona and JR. Since I wanted them to have time to include the correct unit of measurement in their presentation, I decided to give the students a quicker way to make a variable picture. I gave them some shapes and told them to build a snowman out of them. You can download the template by clicking here. Next the students selected a shape from the Shapes tool and measured their snowmen with the shapes. Last, they added a text box with the nonstandard unit of measurement such as “5 stars” or “4 triangles.” I showed them how to add animated builds to the shapes and text box, and then they recorded a voiceover narration. Here are some student examples: Mackenzie, Ryan, and Wyatt.


Tags:


3rd Grade Quadrats

Screen shot 2014-03-17 at 1.41.18 PMThird graders in Ms. Ford’s class at Laburnum Elementary have been learning about multiplication in math (SOL 3.5) and animals in science (SOL 3.4 & 3.5) so today we showed how real life scientists use those skills to calculate animal populations. Many scientists use a tool called a quadrat to figure out how many animals live in a certain area. A quadrat is basically a large square that they place in a habitat and count the creatures in the square. Then they multiply the amount of total squares that would fill the area by the number of animals they counted to get an estimated population for the total area. In order to demonstrate this, the students first drew an animal in Pixie. We exported it as a PNG file and dragged it into a Keynote template that you can download here. Then they made several copies of their animal to place in the quadrat. They also colored the grid to match the animal’s habitat (green for woods, yellow for grasslands, blue for water, etc). Next they made a text box with the multiplication problem and solution (Example: 4 electric eels in the quadrat x 9 total quadrats in the area = Est. population of 36 electric eels). Finally they recorded their voices like they were giving a report to their “boss” and we exported their Keynotes as QuickTime videos. I posted them all to a Google doc that you can take a look at here.


2nd Grade Rounding Videos

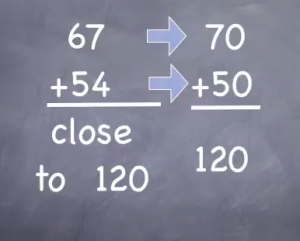
2ndroundingStudents often learn a lot by teaching each other, and there is great value in breaking down the process of solving a math problem step-by-step in order to explain it to someone else. Today 2nd grade students in Ms. Ambrose’s class at Holladay Elementary made videos to teach their classmates about rounding (SOL 2.1) and estimating (SOL 2.6). We used Keynote and the students chose a theme, created a 2-digit addition problem of their choice using text boxes and shapes. I showed them how to add builds to each step so that they would appear in sequence. Then the students recorded their voices explaining the steps in rounding and estimating the sum. We exported the Keynotes to QuickTime videos. Now Ms. Ambrose can use the students’ videos to review. She can pause the videos at different spots to see if her students can solve them, and the students will be motivated by seeing their own videos presented to the class. Now that they know how to do it, they can continue making how-to videos. I posted all their rounding/estimating videos to a Google Doc that you can see here.


Tags:


3rd Grade Greek Multiplication

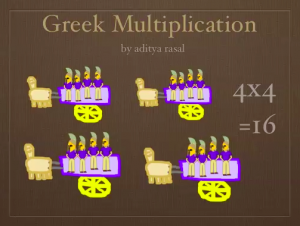
adityarThird graders in Ms. Dickey’s class at Davis Elementary have been learning about the ancient Greeks in social studies (SOL3.4) and multiplication in math (SOL3.2). So today we made Greek multiplication problems using Pixie and Keynote. First the students opened a blank Pixie document and used a combination of the painting tools and stickers to create a picture of one group of items that would be found in ancient Greece: like a ship with 7 jugs of olive oil, or a row of 8 grapevines, or a Medusa with 6 snakes coming out of her head. We exported the pictures as PNG files with transparency (so there wasn’t a background). Then we opened a blank Keynote, added a title and our name, and dragged the PNG file onto the slide. We shrunk it down and copied and pasted it as many times as we needed. Next the students made text boxes to write out the multiplication problem and its solution. I showed them how to click on each object in the order they want it to appear and add a build in animation using the Inspector. Finally the students recorded their voices telling about the multiplication problem and skip counting until they got their answer. I exported the Keynotes as QuickTime videos and posted them on this page.


3rd Grade Ancient Greece Math

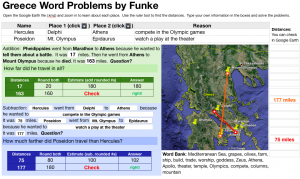
greecemathThird graders in Ms. Leo’s class at Varina Elementary have just started learning about ancient Greece (SOL3.4) so I wanted to take them on a tour of Greece using Google Earth. I created a .kmz file with placemarks on important sites like Olympia, where the first Olympics were held (you can still see the track they ran on), the Parthenon (if you turn on 3-D Buildings you will see it), and Mount Olympus (the highest mountain in Greece where they believed the gods lived). But since my focus this year is on math and writing, I had them to measure the distances between the sites using the ruler tool and write some word problems about those distances. I created a Numbers spreadsheet with a lot of the information pre-loaded, that you can download by clicking here. First the students entered the distances into the spreadsheet. Then they came up with questions about the distances. We talked about clue words for addition (“all together” or “in all”) and subtraction (“how much further” or “how many more”). They made up word problems about Greek characters traveling to the different places and gave reasons why they would visit each place (in order to review what was there). Next they rounded the numbers and got an estimate. Finally they solved each other’s problems, and I had a formula that would check if they were correct when they clicked the red “Check” box.


1st Grade Earth & Sun Animations

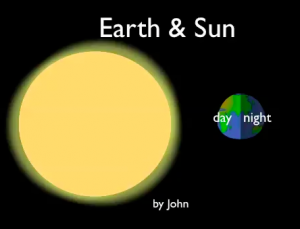
daynightFirst grade students in Mr. McFarling’s class at Davis Elementary have been learning about the Earth and sun and how the Earth’s rotation causes day and night (SOL1.6). So today I taught them how to make some simple animations explaining those concepts using Keynote. First I gave them a template that you can download by clicking here. I showed them how to make text boxes to label the day and night side of the Earth. Then we went to the inspector and added a “build,” or animation, to each label. On the next slide, the students used the Shapes tool to make a circle for the sun. I explained how to change the color to yellow and how to move the shape to the back so it went behind the other shapes. They placed the sun behind the hills in the east (or right side) and added an “action” to it by making it move from the horizon to the top of the slide, showing the sun rising in the east. Then they put the shadow in the correct spot. On the last slide they did the same thing but changed the animation and shadow to show the sun setting in the west. Finally they recorded a voiceover explaining the different animations. Take a look at a couple of student examples: John and Aden.