Category: Kindergarten

Kindergarten States of Matter

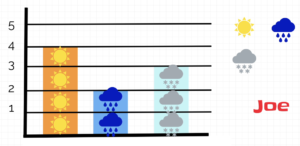
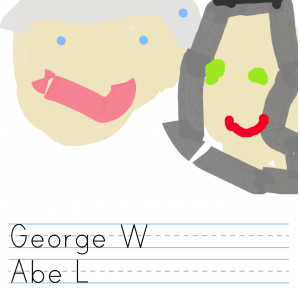
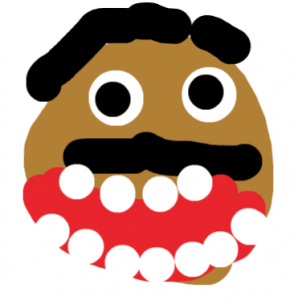
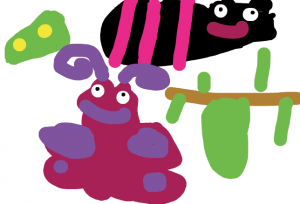
Kindergarten students at Holladay Elementary are learning how to write their names and other words (SOL K.10), and they are studying the states of matter in Science (SOL K.4). Today, students in Ms. Edelblut’s class drew pictures of solids, liquids, and gasses and they typed the words. First, we went to ABCYa! Storymaker and typed our names. I showed them how to use Shift to make a capital letter. Then we discussed different examples of solids, liquids, and gasses. I taught them how to use the paint brush tool to draw each of the three states of matter and how to use the text tool to type the words. Finally we clicked the lines in the top right corner and chose the save icon to download a PDF of our creations. You can look at some student examples here.


Kindergarten Categorizing Matter by Weight

Kindergarteners at Holladay Elementary have been learning how to classify objects and represent data (SOLK.1c). They have also been studying the physical properties matter, such as the relative weights of objects (SOLK.3). Today, students in Ms. Whitfield’s class used ABCYa! Paint to group different objects by weight. First, I showed them how to use the paint brush tool to draw a line down the middle of their paper. Then they drew an “L” for “light” and an “H” for “heavy” on either side of the line. Clicking and dragging to draw and write is a challenging task for small kindergarten hands, but they did it! Next, I instructed them to click on the stickers and choose a few to drag onto their paper. We discussed the difference between real and imaginary objects. Since we can’t really weigh imaginary objects, we concluded that we should use stickers representing real objects for this activity. They put heavy objects on the “H” side (like trucks and big animals) and light objects on the “L” side (like foods and small animals). Finally, we saved our work by downloading it as an image file. You can see some student examples here.


1st Grade LogoMakr Templates

LogoMakr is a cool website for making logos. It has a great library of clip art and customizable text. But one of the things I like most about using LogoMakr in the classroom is you can design templates with it for your students to use. Just set up the page with the text and images you want, then save it, and send the link to students. They can change it up as much as they want, and when they save it, it gives them a new link, so your original template isn’t changed at all. For lower grades it’s especially great because it doesn’t ask them to sign in to use it. Here are two examples I used with first grade students at Laburnum Elementary today: In one class we made fractions (SOL1.4). The students changed the colors of the shapes in my template and typed the fractions in the text boxes. Then they made their own fraction with the shapes tool. In another class we created weather graphs (Math SOL1.12 & Science SOL1.7). The students dragged the weather symbols to make a pictograph, then they dragged the bars to make a bar graph. They also changed the colors of the bars. You are welcome to use these templates or adapt them as you wish. Try LogoMakr with your class!


Kindergarten Life Cycle Animations

Kindergarten students at Trevvett Elementary have been learning about life cycles (SOLK.7c), so today, Ms. Gouldman’s class used ABCYa! Animate to create animations of the butterfly life cycle. First, we reviewed the stages a butterfly goes through–from egg, to larva, to chrysalis (metamorphosis), and to adult. Next, we went to ABCYa! Animate, and I showed them how to use the paint tools to draw some butterfly eggs in frame one. We looked at some pictures of butterfly eggs on the Internet so they could see the size and color of them. I pointed out that many butterfly eggs were laid on plants. Why do you think that is? Then, we went to frame two and drew the caterpillar. We looked at caterpillar images online to see the incredible variety in their colors and designs. We continued with the other stages, looking at photos of each stage, and then drawing our own creative ideas. When we were finished, we slowed down the animation using the frame rate button (bottom right), turned on looping so it repeated, and pressed play. The students were excited to see their butterfly move through each stage. Since it loops, it also shows how an adult lays more eggs and the life cycle repeats itself. Finally, we exported our animations as GIFs, and I uploaded them to a Lino page. Lino is similar to Padlet for sharing files, but since I’ve reached my limit on Padlet for the free account, I had to find something different. You can see all their animations here.


Kindergarten Presidential Portraits

Kindergarten students at Trevvett Elementary have been learning about Presidents Day and the two presidents it honors: George Washington and Abraham Lincoln. Today, students in Ms. Gouldman’s class painted presidential portraits based on research. Yes, even kindergarten students can start learning how to do research. I explained that we wanted our portraits to look like the real presidents, so we had to find out what color their skin, eyes, and hair were. First I asked them to guess, then we looked online for portraits and photographs to confirm or revise our initial thoughts. It was difficult, though, to tell some of the colors from just paintings or black and white photos, so I showed them how to ask Google a question with the microphone button. “What color were George Washington’s eyes?” I asked, and the answer came back: blue grey. Then the students tried it with Abraham Lincoln. We discovered that his eyes were green or grey or hazel (that type of eye color fluctuates depending on the light). We already knew that Abraham Lincoln sported a beard, but we learned that George Washington had light brown or reddish hair, and powdered it so it appeared white (it was a military thing, like a modern day buzz cut). As we looked at the different websites in our research, I explained that some sites are reliable, and some are not. I pointed out that anyone can make a website, in fact, they will be making a sort-of website today, actually. Our website won’t be reliable since we are not professionals, but websites like encyclopedias or museums or scientific organizations are usually reliable, especially when they agree with each other. Now that we had our facts, we went to ABCYa! Storymaker to paint our portraits. The students had already practiced drawing on the computer this year, so that part didn’t take too long. It was a perfect time to teach some typing skills. Storymaker makes typing seem easy and familiar by including elementary lined paper (press the yellow button on the right). I showed the students how to use Shift to make an uppercase letter, and we typed the presidents’ first names. Finally, we exported our pictures and shared them on a Padlet, which is their own “sort-of” website that Ms. Gouldman can send home to parents.


Kindergarten Martin Luther King, Jr. Animations

Yesterday was Martin Luther King, Jr. Day so kindergarten students at Holladay Elementary have been learning about his life and his famous “I Have A Dream” speech. Today students in Ms. Connolly’s class created animated pictures of Martin Luther King, Jr. speaking. First, we went to ABCYa! Animate, and I explained that we would draw two pictures of Dr. King. One would have his mouth in one shape, and the other would have his mouth in a different shape. When we played the pictures together, one after another, it would look like he was talking. In order to draw him accurately, we looked at photos of him. We saw that he had brown skin, black hair, and a mustache. The students tried to draw him on the first frame, then we copied the frame (using the copycat button), deleted his mouth, and redrew it differently. Some students made the mouth open and closed. Others added teeth or a tongue. I showed them how to turn on looping (so it keeps playing), and we exported our animations as .gif files. Finally, we uploaded them to a Padlet so we could see everyone’s. You can play audio from his speech while viewing the animations, and it will look like Dr. King is actually speaking!


Kindergarten Butterfly Life Cycle Animations

Kindergarten students at Holladay Elementary have been learning about the butterfly life cycle (SOLK.7c), so today Ms.Hartwell’s and Ms.Ambrose’s classes created animations showing the life cycle from egg to adult. First, we reviewed the four stages: egg, larva, chrysalis (pupa), and adult butterfly. We used two different websites to create our animations: in Ms. Hartwell’s class we used SketchToy, and in Ms. Ambrose’s class we used ABCYa!Animate, but the process was basically the same for both. We started by drawing the egg. I showed them examples of real butterfly eggs using a Google image search. We noticed that most eggs were white or yellow and were laid on plants. Next we used the drawing tools to draw the larva. Again, I used a Google image search to show examples. We repeated those steps for the chrysalis and the adult butterfly. Finally, we published our animations. SketchToy generates a link which replays the drawing. ABCYa!Animate makes a GIF file that we uploaded to Padlet. You can see Ms.Hartwell’s class projects here and Ms.Ambrose’s class projects here.


Kindergarten Living & Nonliving Things

Kindergarten students at Holladay Elementary have been learning about living and nonliving things in Science (SOL K.6) and how to spell words phonetically to describe pictures in Language Arts (SOL K.12c). Today students in Ms. Ambrose’s class used ABCYa!Storymaker to draw and write about a living or nonliving thing. First we brainstormed a variety of things so that the students weren’t all drawing the same ones. Then they used the paint tools to draw a picture of the item they chose. This requires the students to practice clicking and dragging, which is an important computer skill. They also quickly learned how to use the undo button to fix mistakes (and we explained that, unfortunately, life doesn’t have an undo button). Next, we clicked the writing button on the side and a familiar-looking sheet of lined paper appeared on the screen. I showed them how to use Shift to make a capital letter, and we all typed the first word of our sentence, “I.” Then we typed “am a,” and the students finished their sentences with the name of their object, spelled phonetically. You can see them all here.


Kindergarten Baby Animals

Kindergarteners at Trevvett Elementary have been learning about baby animals and how they look different from the adult animals, and sometimes they have special names (K.7d). Today students in Ms. Gouldman’s and Ms. Haskins’ classes created animated images showing a baby animal turning into an adult. First we brainstormed different kinds of animals and their babies so that we had a variety of ideas. There are also some great websites you can use to review: Cricket (match the baby to the adult), National Wildlife Federation (show what a baby will look like when it grows up), BBC (match the baby animal to its parents), National Geographic (baby animals memory), and Turtle Diary (help the adult find the baby). After our review, the students chose the animal they wanted to illustrate. Then we went to ABCYa! Animate, and I showed the students how to use the drawing tools to draw a baby animal. Next, we clicked the second frame at the top and drew the adult version of the animal. We slowed down the animation with the speed button and set it to loop so it would repeat (just like a life cycle). Finally we pressed the Export button to save it as a .GIF file and uploaded it to a Padlet so we could see everyone’s. You can take a look at their animations here.


Kindergarten Measuring with Nonstandard Units

Kindergarten students at Trevvett Elementary have been learning about bears and hibernation in science (SOLK.6,K.7) and about measurement in math (SOLK.10). Today students in Ms. Sharpe’s class used ABCYa!Paint to draw a bear and measure it with nonstandard units. First we reviewed how to click and drag to paint, then the students clicked the paintbrush, chose a color, and drew a big bear. As they drew their bears, we discussed the special features bears have (ears, tail, claws, teeth, fur, etc.), and I displayed some photos of real bears for their reference. Next I showed them how to use the stickers to find a nonstandard unit of measurement. They had to click the “Categories” button to choose a type of sticker, like “Sports,” “Birthday,” or “Yum.” We reviewed how they had to use the same sticker for their measurements, and they had to stack them one on top of the other to be accurate. Some students were able to make two measurements with different units and compare them (like the image on this blog post). We didn’t put the answers on the pictures because we wanted Ms. Sharpe to use them as a review. So I exported their drawings and uploaded them to CoMemories (a great site for easily sharing photos). Now Ms. Sharpe, or even parents, can go to that site and look through the images to review measurement and/or bear facts. You can see them all here.